
The 6-Step Cannabis Cultivation IPM Journey: From Empty Room to Next Harvest
The 6-step cannabis cultivation IPM journey is a full-crop-cycle sequence, not a scout-and-spray reaction. It runs: (1) biosecurity at the perimeter, (2) room reset between cycles, (3) environmental controls with an air-quality baseline, (4) scouting and monitoring, (5) intervention in order (biological, cultural, chemical), and (6) post-harvest testing with an audit trail, then it loops back to step one. The framework splits two halves cultivators usually blur: plant-directed work (scouting, biologicals, cultural controls) and facility-directed work (biosecurity, surface and air sanitation, documentation). Here is each step, built for single-room and small multi-room facility managers.
Step 1: Biosecurity at the perimeter
The first pest problem starts at the door, not in the canopy. Biosecurity is everything you do to keep contamination from entering the room in the first place: controlled entryways, footbaths, dedicated PPE, clean genetics, and an isolated mother room so one infected cutting does not seed the whole facility. The top-ranked IPM pages skip this entirely. The incumbent in position one opens its program with monitoring, stating that "The IPM journey commences with diligent plant monitoring." Monitoring is step four here, not step one, because by the time you are inspecting leaves for damage, the contamination is already inside. That reordering is the single biggest thing single-room grows get wrong and pay for later.
Practically, this means treating the room as a sealed system the way a biosecurity program would. Incoming clones go through a quarantine and inspection before they ever touch the flower room. Staff and tools follow a one-way clean-to-dirty flow. This is the part of the journey that reads like science rather than gardening, and it is exactly where GroClarity's biosecurity framing earns its place: the science of keeping a contaminant out is cheaper than the biology of chasing it once it is in.
Step 2: Room reset between cycles
Step two is the turnover window, the stretch after you pull the last plant and before you bring in the next round. For most single-room operators this is where 3 to 5 days of downtime disappears, often because the crew is waiting out bleach fumes before they can safely re-enter. That is the problem to solve: you need surface sanitation that does not leave residue where the next crop will sit, and an air reset that does not force an evacuation longer than the turnover itself.
This is a facility-directed step, done in an empty room, which is what makes it the right place for the harder-hitting tools. A fast air reset using a fast-release ClO2 gas belongs here, in an empty room, because the labeled use for that format is empty-room only. Surface disinfection of grow beds, benches, and drop-down hoses belongs here too, using a residue-free hard-surface disinfectant rather than bleach or quats that leave a film the next crop will contact. The payoff is a shorter turnover and a documented clean start, which is the difference between four harvests a year and five.
Step 3: Environmental controls and the air-quality baseline
Before the lights come back on, step three sets the environment and starts the data trail. HVAC, vapor pressure deficit, and air movement are the controls that decide whether mold pressure builds or stays flat across the cycle. The step most operators skip is the baseline: measuring and logging air quality from day one so you have a trend line, not a single panicked reading the week before a mold test.
That air-quality data trail is also a compliance asset. Head growers and QA leads answer to auditors who ask for proof the environment was controlled, not just an assurance. Logging room, date, readings, and treatments from the start of the cycle gives you that proof. None of the ranking pages connect environmental control to an audit-ready record. GroClarity's position is that the data belongs on the page and in the binder, not in someone's memory.
Step 4: Scouting and monitoring during the crop cycle
Now the plants are in and the plant-directed work begins. Scouting is disciplined visual inspection on a schedule, looking for the pathogens that hit cannabis specifically: powdery mildew, botrytis (bud rot), russet mites, thrips, root aphids, and fusarium. The incumbent page actually gets the spirit of this right, advising growers to "Carve out time for regular visual inspections of your cannabis plants." The gap is that it treats monitoring as the whole program rather than one step inside a sequence.
Monitoring only earns its keep when it is tied to action thresholds, the pre-decided trigger points that tell you when an observation becomes an intervention. A single thrips is a note in the log. A rising count across three scouting passes is a decision. Writing those thresholds down before the cycle, rather than improvising mid-flower on a six-figure crop, is what turns scouting from a chore into an early-warning system.
Step 5: Intervention in order, biological then cultural then chemical
When a threshold trips, the order of response is the whole discipline of IPM. Biologicals first: beneficial insects and predators matched to the growth stage. The incumbent names this correctly, writing that "The integration of beneficial insects and natural predators forms the crux of" an IPM program, with allies like ladybugs and lacewings. Cultural controls next: targeted defoliation, sanitation of affected material, and plant spacing that cuts humidity pockets. Chemical intervention comes last, not first.
When chemistry is warranted, product selection is constrained by one rule that governs everything on the GroClarity property: the labeled use. A ClO2 product labeled "Not for use with/on plants/crops/feed" is an empty-room tool, never a canopy spray. A hard-surface disinfectant stays on surfaces, not on buds. The residue-free requirement is not a preference when plants are in the room, it is the line between a usable surface and a contaminated crop. This is where cultivators churn out of confusion (not knowing what ClO2 actually is), and it is where plain, label-accurate education beats a sales pitch.
Step 6: Post-harvest testing and the audit trail
The journey does not end at harvest. Step six is the pre-sale yeast and mold load test and the record that backs it. State-mandated thresholds vary, so the concept to internalize is that a number you cannot document is a number an auditor will not accept. The audit trail you started in step three closes here: room, cycle, treatments, air-quality readings, re-entry times, and tech initials, assembled into something a compliance reviewer can read without a phone call.
Then the room empties and the loop restarts at step one. That is the part the word "journey" is doing work for. IPM is not a linear checklist you finish; it is a cycle that resets with every harvest. A failed mold test on a mature crop costs more than twelve months of a disciplined program, which is the math that moves prevention from a cost line to an investment for an owner reading the P&L.
How ProKure fits across the journey
GroClarity educates on the journey; ProKure supplies the ClO2 tools for the facility-directed steps. The honest, label-accurate version matters here because the product restrictions are not interchangeable.
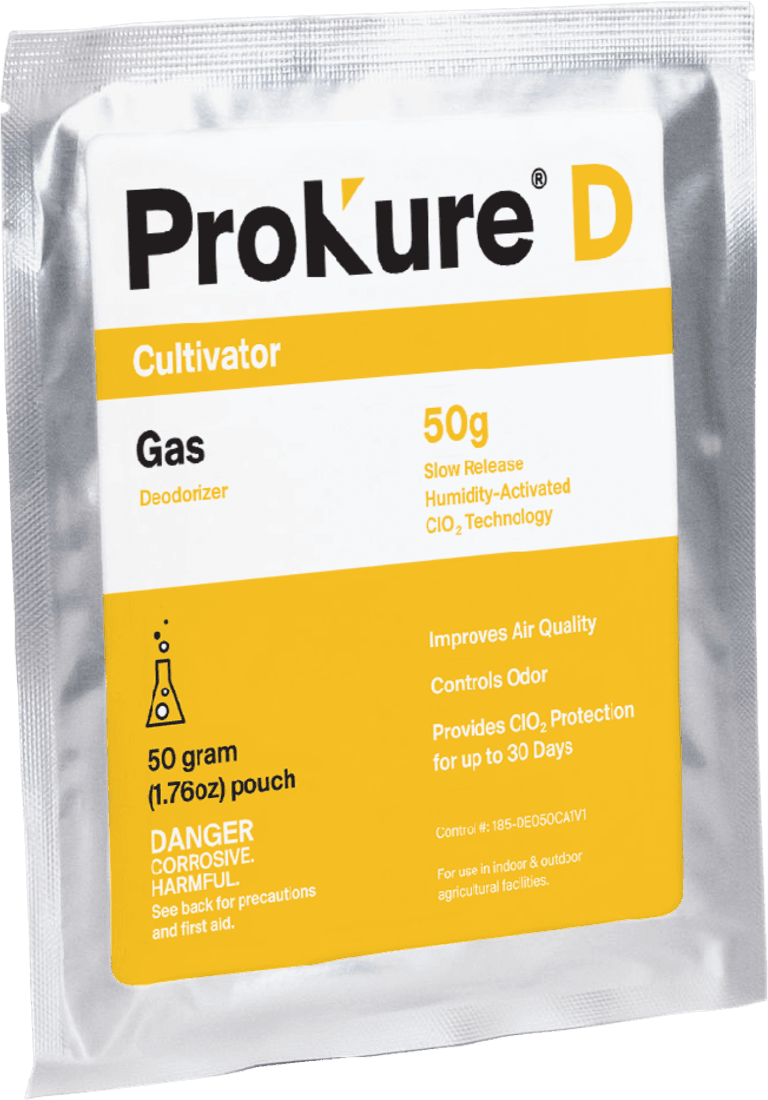
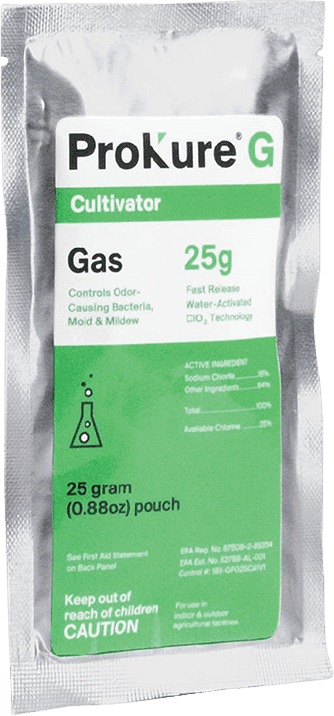
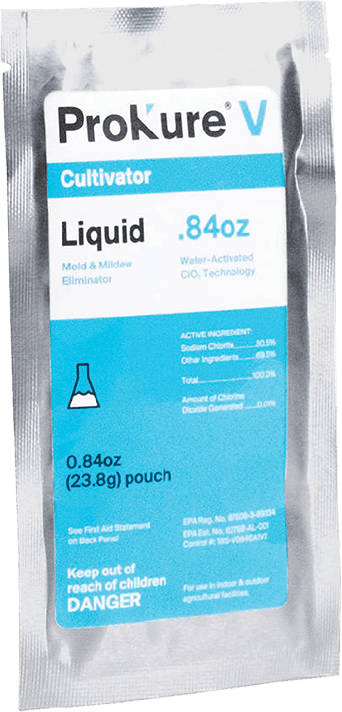
ProKure D is a slow-release gas that provides ClO2 protection for up to 30 days. It is an air-quality and odor-control product, and it is not an EPA-registered product and not labeled for sale as a pesticide under 40 CFR. It fits the ongoing environmental step (step three) and runs with plants in the room. ProKure G is a fast-release deodorizing gas, EPA Reg. No. 87508-2-89334, that works in 4 to 6 hours and is labeled not for use with or on plants, crops, or feed, so it belongs to the empty-room reset (step two) with people and pets out during treatment. ProKure V is a liquid hard-surface disinfectant, EPA Reg. No. 87508-3-89334, used at 100 ppm for a 10-minute exposure on hard, non-porous surfaces; it is suitable for use with plants in the room because it treats surfaces, not air, and it leaves no residue, which is the between-cycle surface-turnover answer bleach cannot give.
ClO2 (chlorine dioxide) explained plainly, since not knowing what it is drives real churn: it is a sanitizing agent used on the environment around plants, not a pesticide applied to the plant. ProKure's own framing is treating the environment around plants as opposed to treating the plants themselves. For the deep chemistry, labels, and SDS, prokuresolutions.com carries the full documentation. To buy the line, the ClO2 products ship from shop.groclarity.com. It is a violation of Federal Law to use any of these products in a manner inconsistent with the labeling, so read the entire label before use.
Frequently asked questions
What are the 6 steps of an IPM program?
In this cannabis-specific framework: biosecurity at the perimeter, room reset between cycles, environmental controls and an air-quality baseline, scouting and monitoring, intervention in order (biological, cultural, chemical), and post-harvest testing with an audit trail. The classic EPA model names four (action thresholds, monitoring, prevention, control); this six-step version expands it to cover facility-directed sanitation and compliance that cannabis cultivation specifically requires.
What are the different stages of cannabis cultivation?
The crop cycle moves through propagation, vegetative growth, flowering, and harvest, then a room-reset window before the next propagation. The IPM journey maps onto that timeline: biosecurity and room reset happen in the empty-room window, environmental controls and scouting run through veg and flower, and testing plus the audit trail close out at harvest before the loop restarts.
Why don't more farmers use IPM?
Because it is usually taught as monitoring alone rather than as a full sequence, so it feels like extra labor without a clear payoff. When IPM is framed as six ordered steps tied to the crop cycle, the payoff is concrete: shorter turnover, flatter mold pressure, and a documented record that passes a pre-sale test. The discipline is in the order, not in doing more work.
When in the crop cycle should I start my IPM program?
Before the plants arrive. The journey starts at step one (biosecurity) and step two (room reset) while the room is empty, because the cheapest contamination to manage is the one you keep out. Starting IPM at the first sign of pests, which is step four, means you began three steps too late.
Is ClO2 safe to use around cannabis plants?
It depends on the specific product and its label. ProKure D is a slow-release gas for air quality that runs with plants in the room, and ProKure V disinfects hard surfaces and is suitable for use with plants in the room. ProKure G is labeled not for use with or on plants, crops, or feed, so it is an empty-room tool only. Always follow the labeled use for the exact product.
Related resources