
A cannabis mold prevention protocol checklist is a dated, sign-off-ready document a grower or facility manager runs on a schedule, daily, weekly, per cycle, and around harvest, to keep humidity, airflow, surface sanitation, and air testing inside the ranges that stop mold before it starts. This page gives you the checklist rows in visible copy, the humidity number to hold at each growth stage, the EPA restriction that governs any sanitizer you use near plants, and a free printable PDF. If you already have visible mold, this is the wrong document; you need treatment, not prevention, and the handoff is in the next line.
One scope note before you start. This is a prevention checklist, not a treatment guide and not a product page. If you have an active outbreak, start with the broader program under mold prevention protocols and the cultivation know-how behind it under cultivation IPM expertise. If you are here for the between-cycle room reset, the surface tool is ProKure V liquid surface disinfectant and the empty-room air step is ProKure G fast-release gas. Everyone building a running prevention routine, stay.
Cannabis mold prevention checklist at a glance
Here is the whole checklist in ten lines. The sections below explain each one and give you the row structure to log it.
- Hold relative humidity to the stage target (clone through storage).
- Hold temperature in the stage range, canopy below 75F, storage 60 to 70F.
- Verify airflow and check for dead zones every day.
- Walk the canopy daily for early Botrytis and powdery mildew signs.
- Enforce PPE and a boot bath at every room entry.
- Swab high-touch surfaces weekly with an ATP test against a set threshold.
- Service filters and dehumidifier drains on a weekly and monthly cadence.
- Run the full between-cycle room reset at every turnover, plants out.
- Sample the air on a set frequency and keep the readings.
- File the SDS, the EPA label, and the signed log for every sanitation event.
That list is the featured-snippet version. The working document is the rest of this page. Notice what the ten lines have in common: each is a thing an operator can do and record in a few minutes, not a principle to internalize. That is the test every row has to pass, because a checklist built from aspirations gets ignored the first busy week, while a checklist built from concrete, timeable actions gets run. If a line cannot be completed and initialed quickly, it does not belong on the checklist; it belongs in the training that stands behind it.
Why a checklist beats memory
Sixty seconds of context, then we move on. Mold prevention fails in the gaps between good intentions, the Tuesday nobody checked the far corner, the filter that went a month past due, the turnover that got rushed because the next crop was waiting. A checklist closes those gaps by making the check a line someone initials, not a thing someone meant to do.
The money backs this up. A 2026 cannabis inventory-software analysis reports that a contamination event drives insurance premiums up 20 to 30%, and the same source notes regulatory fines can reach six figures. Those costs outlive the lost crop. Against a failed pre-sale test on a harvest worth six figures, a prevention routine that costs a few logged minutes a day is not a cost line, it is the cheapest insurance in the building.
There is a second reason the document matters beyond catching drift: it standardizes the operation across people and shifts. A head grower cannot be in every room at every hour, and a crew lead on a Saturday needs the same standard as the owner on a Monday. The checklist is how the standard travels, from the person who set it to the person actually holding the meter. For a multi-facility operator, that is the whole game: one document, run the same way in every room in every state, is what a Cultivation Director defends to ownership and to an auditor who crossed a state line. A patchwork of habits that live in people's heads does not survive turnover, literally, the staff kind. For the biology behind why each check matters, the parent program is mold prevention protocols.
Daily and weekly prevention checks
The daily checks are the backbone. They catch the drift that becomes an outbreak. Mold is a math problem before it is a biology problem: hold the environment outside the germination envelope and most of what the rest of the checklist guards against never gets a foothold. The daily cadence exists because the envelope is held or lost in hours, not weeks, and a reading taken once a week tells you nothing about the overnight humidity spike that already did the damage.
Daily checks, with a sample sign-off row
Each day, per room: read and log relative humidity, read and log temperature, walk the canopy for early signs (yellowing or whitening leaves near the cola that flag Botrytis starting inside, the first chalky haze of powdery mildew), verify airflow and physically check the corners and the spaces behind equipment where stagnant air pools, and confirm PPE and boot-bath compliance at entry.
The log row an inspector actually wants looks like this: date, time, room, RH reading, temp reading, operator initials, notes. A check with no initials and no reading is a check you cannot prove you ran, and an unprovable check is treated as a skipped one.
The canopy walk deserves its own discipline. Mold does not announce itself; it hides. Botrytis starts inside the cola and works outward, so the surface looks fine until the rot is already established, which is why the early tells (a yellowing or whitening leaf near the bud) matter more than the obvious gray patch. Powdery mildew is the opposite problem: it sits on the surface as a faint chalky film that an operator in a hurry reads as dust. Train the walk so the crew knows what each looks like at its earliest stage, and log which rooms were walked, not just that a walk happened. A walk that covers four rooms and skips the fifth is the walk the outbreak hides in.
Airflow is the check most operations treat as set-and-forget, and it is the one that quietly fails. A fan that was aimed right in week one drifts, a new piece of equipment creates a dead pocket, a canopy fills in and blocks the cross-breeze it had in veg. The daily airflow check is a physical check of the corners and the undersides, not a glance at a fan that is running. Moving air is not the same as air reaching every surface.
Weekly checks
Once a week, add the slower-moving items. Inspect filters: pre-filters get changed often (every one to three months is a commonly cited interval, more in a dusty room), and a true HEPA stage captures airborne spores down to the submicron range where most mold spores live. Clean oscillating fan blades, because a dusty blade is a spore distributor. Check the dehumidifier drain line, a classic standing-water reservoir. Swab high-touch surfaces (door handles, trim shears, trays) with an ATP test and read the result against a pass, caution, and fail threshold you set per surface class. Expose a settle plate or pull a viable air sample on your set cadence so you have an air-quality data trail, not just a surface one. Watching the canopy for a single pathogen in detail belongs to cultivation IPM expertise.
The ATP swab is worth explaining because it is the check that converts "looks clean" into a number. An ATP swab reads organic residue in relative light units, and you set three bands: a pass, a caution that triggers a re-clean, and a fail that stops the next step until the surface is redone. The exact numbers depend on your meter and your surface classes, so set them once with your supplier and hold them. The value is not the single reading; it is the trend. A high-touch surface creeping up week over week is telling you a cleaning step is slipping before an outbreak tells you louder. The air sampling does the same job for the room volume that the swab does for the bench, and the two together are the data trail a head grower can hand an auditor to prove the room was under control, not just that it looked fine.
Per-cycle turnover checks
This is the block that solves the facility-manager pain: the 3-to-5-day turnover lost to bleach fumes and crew evacuation. The between-cycle reset runs with the room empty and the plants out, which is exactly what unlocks the fastest chemistry.
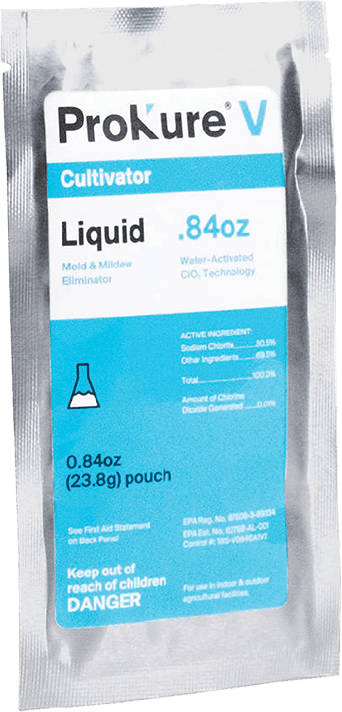
The sequence: evacuate the room and remove all plant material, strip and clean all non-porous surfaces of gross soil and film (sanitizer does not work through a dirty surface), then disinfect. For surface disinfection, ProKure V is a hospital-type liquid disinfectant that works at 100 ppm with a 10-minute exposure on hard, non-porous surfaces. You add water to activate it, and it leaves no residue: no wipe, no rinse. It is suitable for use with plants in the room, so it is the surface tool you can keep using once the next crop is in.
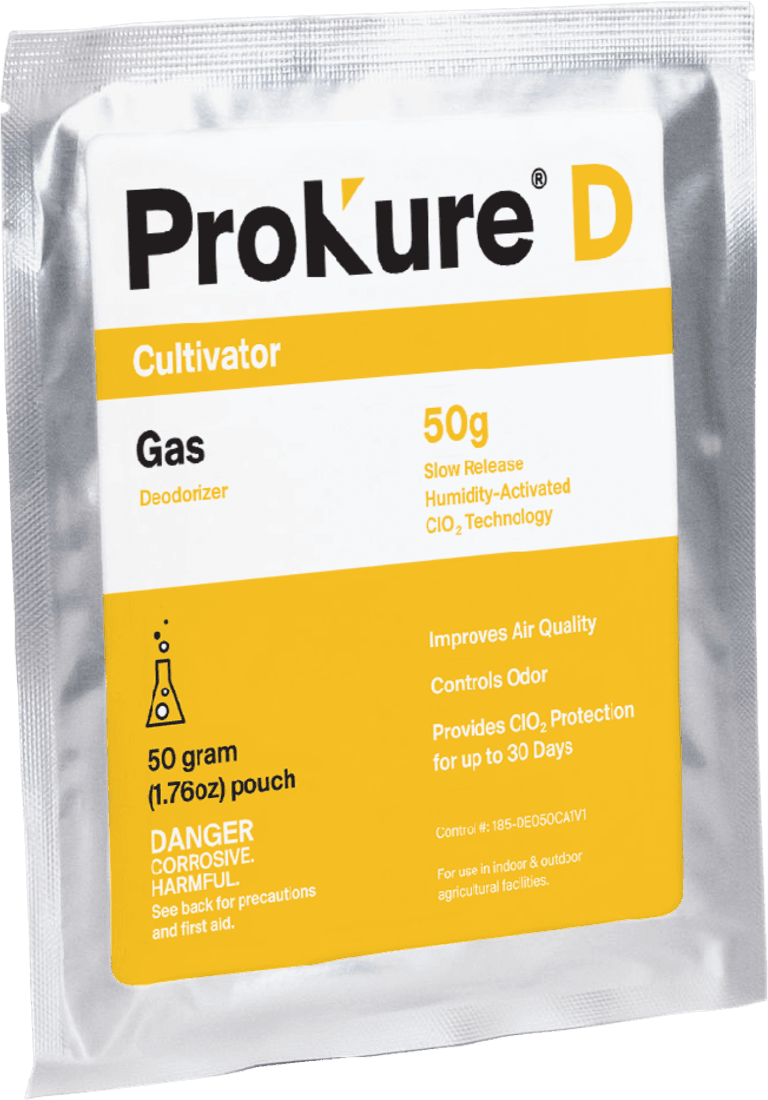
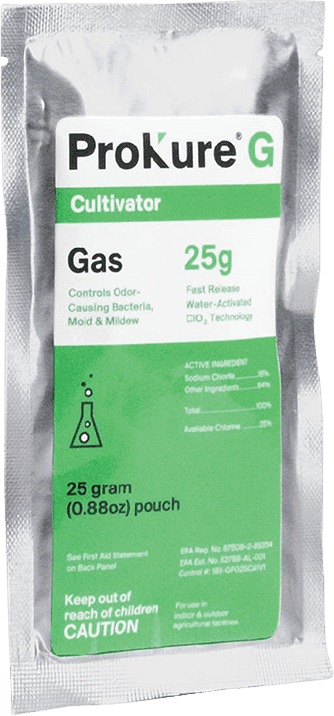
For the empty-room air-phase step, ProKure G is the fast-release gas deodorizer and the solution for mold and mildew, odor-causing bacteria, and chemical odors between harvests. It works in four to six hours. ProKure G carries the required disclaimer, verbatim: "Not for use with/on plants/crops/feed." That is why the room is empty and the crew is out during treatment, with at least one hour of ventilation before anyone re-enters. Removing the plants is not a suggestion for the gas step; it is a federal label condition.
After treatment, re-swab with ATP to confirm the surfaces cleared, replace the HEPA filter if it is due, and log the contact time and the cleared re-entry time. A residue-free workflow like this is what lets a turnover run in hours instead of the multi-day bleach cycle, because there is no evacuation for lingering fumes and no rinse step before the next crop touches the bench.
Sequence the steps so they overlap rather than stacking end to end, which is where the multi-day turnovers lose their time. Gross-soil removal and surface cleaning can run while the filters are being changed; the HVAC service can run while a surface disinfection contact time is counting down. The checklist should lay the steps out in the order that lets the slow steps (contact times, ventilation windows) run in the background while the hands-on work continues elsewhere. A turnover is a scheduling problem as much as a cleaning problem, and the operations that still lose five days are usually the ones running every step in series. Do not combine products to save time, though: chlorine dioxide chemistry should not be mixed with acids or other cleaners, so finish one chemistry, ventilate, then move to the next. For the full written procedures, see ProKure V liquid surface disinfectant and ProKure G fast-release gas.
Pre-harvest, post-harvest, and storage checks
The risk does not end when the lights come down. These rows cover the window where a good crop still goes bad.
Pre-harvest, days 7, 3, and 1 before cut
Step the late-flower humidity down on schedule, prep and sanitize the dry room before anything hangs in it, calibrate the moisture meter, space the hang so air moves between colas, and verify the dry room's air exchanges. A crowded, humid dry room undoes a clean grow in 48 hours. The pre-harvest window is where a lot of operations relax exactly when they should tighten, because the crop looks finished and the team is focused on the cut. The checklist's job here is to keep the discipline through the finish line: the dry room is sanitized and verified before a single plant hangs, not after, because retrofitting sanitation around a hung crop is nearly impossible.
Post-harvest, cure, and storage
Hold the dry room on the low end of the humidity range and the temperature steady. Set a burping schedule for cure jars and do a visual-and-smell check per jar, because your nose catches a musty jar before a meter does. For jarred-flower storage, hold temperature in the 60 to 70F band and relative humidity below the storage ceiling. Procurement and QA add their rows here: SDS on file and the EPA label on file for every sanitation SKU, a reorder cadence that never leaves you short mid-turnover, and one known location for the audit binder. The reorder row is easy to dismiss until the turnover you cannot run because the sanitizer did not arrive, which turns a 72-hour reset into a week while a room sits empty and unprotected. Tie the reorder trigger to the turnover schedule, not to the moment someone notices the shelf is bare. The audit-binder row matters for the same reason the sign-off column does: an inspector who asks for the SDS and the label for the product named in your SOP expects to be handed it, not to watch you search. One known location, kept current, is the difference between a five-minute document check and a finding.
State action limits and humidity by stage
Two reference tables turn this checklist from a routine into a compliance document. Both ship in the downloadable PDF; here is how to read them.
The state yeast and mold action-limit table
Total yeast and mold limits, expressed in CFU per gram, and the Aspergillus species a lab screens for, are set per state and they move across state lines. The PDF carries a multi-state table (states such as CA, CO, MI, MA, IL, NY, NJ, AZ, NV, and OR), and every row cites the issuing state regulator's page, because a limit with no source is a liability, not a reference. We do not print invented caps in this copy. For a multi-state operator, the rule is simple: build the checklist to the strictest limit in your footprint and it passes everywhere looser.
The Aspergillus column is the one to read closely, because it behaves differently from the total count. Several states screen specifically for Aspergillus species, and the organism matters beyond the live count: if Aspergillus was present, its mycotoxins can persist even after the organism is killed, which is why a prevention-first posture beats any after-the-fact treatment for this pathogen. The checklist weights the Aspergillus-relevant checks (dry-room sanitation, air sampling, surface swabs) accordingly, because passing a total yeast and mold count while carrying an Aspergillus problem is the failure mode that catches operations by surprise.
Reconciling the humidity numbers
Published guidance disagrees, and the disagreement confuses growers. One source says hold below 50%, another says a 40 to 60% range, another says below 65% for storage. They are not contradicting each other; they are talking about different stages. The honest answer is stage-specific: a 40 to 60% range is the commonly cited window, you run the higher end in clone and veg, and you drop below 50% through late flower when dense buds hold moisture, then hold the dry and storage end lower still. The checklist publishes one target per stage so an operator never has to reconcile three articles mid-shift.
The reason the single-number advice is dangerous is that a number that is right for veg is wrong for late flower. Hold a veg room at the flower target and you fight unnecessary stress and cost; hold a late-flower room at the veg target and you have built the exact humid, dense-canopy condition Botrytis wants. The stage table is not pedantry, it is the difference between a humidity policy that prevents mold and one that invites it. Publish the number next to the stage, and the operator reading a meter at 2 a.m. knows instantly whether the room is in range, without doing math or opening a second document.
The residue-free question, and the download
Why does the chemistry even matter? Because the convenient surface sanitizers are the ones you cannot safely use near a crop. Bleach off-gasses fumes that force the crew out, corrodes stainless, and leaves residue. Quaternary ammonium compounds leave a residue too, which is the problem when the next crop's roots and leaves touch the same surfaces. Chlorine dioxide is the chemistry GroClarity builds around because the residue-free, plant-safe surface tool (ProKure V) can keep working with plants in the room, while the empty-room gas step (ProKure G, which carries the "Not for use with/on plants/crops/feed" restriction) handles the turnover air phase. Surface disinfectants are applied to surfaces, not to plants. The chemistry detail, labels, and SDS live at the deep-detail source, prokuresolutions.com.
The practical takeaway for the checklist is a two-column sorting an operator never has to think through under pressure. One column holds the products cleared for use with plants in the room, where ProKure V's residue-free surface disinfection lives, the tool you can run mid-cycle. The other column holds the empty-room-only products carrying the plants, crops, or feed restriction, where the ProKure G gas step lives, the tool that runs during turnover with the room cleared. The checklist pre-sorts every product into its column and names the room condition required before it comes off the shelf. That single piece of up-front sorting is how the biggest compliance worry, using the wrong product at the wrong time, becomes a checkbox instead of a judgment call made at the end of a long shift.
Everything above is visible on purpose, so you know the document before you give up an email. The gated PDF is the printable, dated, sign-off-ready version with every row, both reference tables, and the EPA label card. The form asks four things: name, email, facility type (single-room, multi-room, or MSO), and state, so the state table loads your row and the follow-up fits your operation. Download it, print it, and hand it to whoever walks the rooms.
Related resources