
Cannabis Mold Prevention Protocol by Lifecycle Stage: Clone Through Storage
Mold pressure in a cannabis grow is not one problem with one setting. It changes pathogen, changes humidity target, and changes the control you reach for at every stage from clone to packaged flower. A single instruction like keep humidity low fails on contact, because the 48 percent relative humidity that protects a late-flower cola will desiccate a fresh clone and stall its rooting. This page maps six lifecycle stages, clone, vegetative, flower, dry, cure, and storage, and names the dominant pathogen, the target RH band, and the sanitation cadence that each one demands. Each stage hands off to its full protocol so you can go deeper where your risk lives right now.
The six stages at a glance
Before the stage detail, here is the whole lifecycle on one screen. Read down the column that matches where your crop is right now, then jump to that stage below. The numbers are operating bands, not rigid set points, and they move with strain, room load, and airflow. What matters is that each band is different, and that the sanitation cadence tightens as the plant moves toward a saleable, testable product.
| Stage | Dominant mold risk | Target RH band | Target temp | Sanitation cadence | --- | --- | --- | --- | --- | Clone and propagation | Damping-off, Botrytis on wound sites | 70 to 80 percent | 72 to 78 F | Before every stick, dome wipe between rounds | Vegetative growth | Powdery mildew on expanding leaves | 55 to 70 percent, descending | 72 to 80 F | Weekly surface wipe, tools between rows | Flower | Botrytis (bud rot) inside dense colas | 50 to 60 early, 45 to 55 late | 68 to 78 F | Daily scouting weeks 5 to harvest | Dry | Botrytis carryover, surface mold on racks | 55 to 62 percent | 60 to 68 F | Full room reset between every load | Cure | Mold on cured flower, water activity creep | 58 to 62 percent in vessel | 60 to 70 F | Vessel sanitation between batches | Storage and pre-sale | Mycotoxin development, re-contamination | below 60 percent vault | 60 to 70 F | Logged, scheduled, audit-ready |
Two patterns fall out of that table. First, the humidity target drops almost monotonically from clone to late flower, then holds steady through dry, cure, and storage. Second, the cost of a mold event climbs the whole way. A contaminated clone costs you a cutting. A positive mold test on cured, packaged flower can cost you a six-figure harvest and a compliance finding. Your protocol should get stricter, not looser, as the plant ages. Most growers run it backward: they fuss over clones and relax at the finish line, which is exactly where the money is.
There is a reason to treat the table as the spine of your whole program rather than a reference chart. A lifecycle view forces you to plan the handoffs between stages, and the handoffs are where crops get lost. A clone that roots in a dome at 78 percent does not step into a flower room at 50 percent without a transition. A plant that finished a clean flower cycle still arrives in the dry room carrying whatever spore load the flower room held. Cured flower that tested clean still has to survive weeks in a vault. Each arrow between two rows in that table is a moment where the environment changes faster than the biology does, and that lag is the opening mold uses. When you manage the lifecycle as a connected chain instead of six separate rooms, you start watching those transitions on purpose.
The competitive pages that rank for cannabis mold prevention tend to flatten this. One industry page we reviewed covers vegetative growth, flowering, and post-harvest drying as a passing frame rather than a structure, and routes the reader toward a filtration product. In its own words, the vulnerable stages are listed this way: "These fungal pathogens thrive in humid, stagnant conditions and can target crops during key growth stages". That is true, and it is also where most content stops. Naming the stages is not the same as giving you a per-stage band and cadence. Another widely cited guide organizes itself around three pathogens and four generic prevention categories, environment, ventilation, sanitation, and IPM, which is useful background and still leaves you without a stage-by-stage operating plan. The rest of this page does the second thing: it gives you the band, the pathogen, the cadence, and the handoff for each of the six stages, then answers the questions readers ask alongside this one.
One framing note before the stages. This page is the map, not the terrain. It is built to show you where your current mold risk lives and which protocol applies, and each stage links to the deeper protocol for that stage. If you already know you have a bud-rot problem, jump to flower. If your losses show up in the dry room, go there. If you are standardizing a program across several facilities, read the whole thing top to bottom, because the value for a multi-site operator is in the consistency of the chain, not any single room.
Three principles run under every stage, so it helps to state them once. Environment first: the humidity and temperature band is the primary control, because it decides whether a spore that lands finds the conditions to grow. Sanitation on a cadence second: you cannot keep spores out of a working grow, so you keep the load down with scheduled cleaning and the right disinfectant for an occupied or empty room. Verification third: a reset you did not measure is a reset you cannot trust, and a record you did not keep is proof you do not have when an auditor asks. Those three, environment, sanitation, verification, repeat at every stage with different numbers. Learn them once and the per-stage detail becomes a matter of plugging in the right band and cadence.
Stage 1: Clone and propagation
Why mold hits clones
Clones live in the most mold-friendly environment you will ever build on purpose. Domes trap humidity at 70 percent and up so cuttings can pull water through leaf tissue before roots exist. Every cut stem is an open wound. Trays sit packed edge to edge with little air movement between cells. That combination, high moisture, wound sites, and dense spacing, is the ideal setup for damping-off and for Botrytis to colonize a stem before the plant can defend itself. The paradox of the clone stage is that the humidity you need for rooting is the same humidity that feeds rot, so your margin for error is thin and your sanitation has to carry the load the environment cannot.
The biology is worth understanding because it dictates the protocol. A cutting has no roots, so it cannot regulate its own water the way an established plant does. You hold the dome humid precisely so the cutting does not wilt while it builds roots. But fungal spores read that same humidity as an invitation, and the fresh cut at the base of the stem is a wound with no cuticle to defend it. Damping-off, a catch-all for several fungal and oomycete pathogens that rot the base of a seedling or cutting, is the signature clone-stage failure. You see it as a dark, water-soaked lesion at the stem base, and by the time it is visible the cutting is usually lost. Botrytis is the other threat, taking hold on cut surfaces and necrotic leaf tissue and spreading cutting to cutting across a packed tray.
Target environment
Hold the dome at 70 to 80 percent relative humidity for the first few days, with media and ambient temperature in the 72 to 78 F range. As roots appear, start venting the dome on a schedule, cracking it wider each day so the cuttings transition toward the lower veg band instead of slamming into dry air. Bottom heat helps rooting speed, which shortens the window a clone spends defenseless. The faster a cutting roots, the sooner you can pull humidity down and close the door on damping-off.
The transition out of the dome is the part most crews rush or neglect. If you pop the dome off entirely on day four, you shock the cuttings and some wilt. If you leave it fully closed until roots are obvious, you hold the high-humidity window open longer than the biology needs and give mold extra days. The disciplined version is a daily step-down: crack the vents a little wider each day, watch the cuttings for wilt, and let the plants tell you the pace. A clone that roots in seven days instead of fourteen has spent half as long in the danger zone. Rooting speed is a mold-prevention lever, not just a throughput one.
Sanitation cadence
This is where clone mold is actually won. Sterilize your scalpel or blade between every cut, not between every tray. Dip or disinfect trays and inserts before they are planted, never after a batch when the spores are already seeded into the plastic. Wipe the inside of every dome between rounds, because a dome that looked clean to the eye carries the last batch's spore load into the next one. Clone propagation is a surface-disinfection problem more than an air problem, which is why a residue-free surface disinfectant matters here: you are treating trays, blades, and bench surfaces that fresh tissue will touch.
Think about the clone room as a place where you are deliberately running a high-humidity environment, so your only real defense is keeping the surfaces and tools that touch open wounds clean. That means a written sanitation order of operations: new blades or a sterilized blade per mother plant, trays and domes disinfected and dried before planting, the propagation bench wiped down before each session, and gloves changed between sources. A surface disinfectant that leaves no residue is the right chemistry here because fresh tissue and new roots will contact the treated surfaces, and you do not want a residue sitting where a cutting will root. The product side of this belongs to a plant-safe liquid disinfectant rather than any gas treatment, because the room is occupied by living tissue the entire time.
What a clean clone round actually looks like
If you want a quick self-audit, a clean clone round has four marks. First, loss rate to damping-off stays low and stable round over round, not spiky. Second, you can name the last time each dome was disinfected. Third, your blades and trays are sanitized before contact with tissue, on a cadence a new employee could follow from a checklist. Fourth, the step-down out of the dome is scheduled, not improvised. If any of those four is missing, that is your clone-stage gap, and it is cheaper to fix here than anywhere downstream.
It also helps to remember why the clone stage rewards sanitation over environmental control more than any other stage. Everywhere else in the lifecycle, you fight mold mostly by moving the humidity band down and the airflow up. In propagation you cannot, because you are holding humidity high on purpose, so the only lever left is keeping the surfaces and tools that touch open tissue clean. That is the whole reason a residue-free, plant-safe surface disinfectant earns its place in the clone room: you are treating trays, domes, and blades in a space full of defenseless tissue, and you need chemistry that leaves nothing behind for a new root to sit in.
Full protocol: see the clone-stage detail inside the mold prevention protocols hub.
Stage 2: Vegetative growth
Dominant risk: powdery mildew
Veg is when powdery mildew gets its opening. As plants stack nodes and throw broad fan leaves, you create exactly the dense, humid canopy that mildew colonizes. One of the top-ranking cannabis mold guides describes the timing plainly: "Powdery mildew usually appears when plants start to get bigger and develop large, broad leaves (their ideal home). Plants grown in densely packed grow rooms, along with those in compact greenhouses, are more susceptible than most." The lesson is spacing and airflow, not spraying. Mildew that takes hold in veg rides the plant into flower, where you can no longer treat it without touching the crop.
Powdery mildew is a different kind of problem from Botrytis, and the difference matters for how you fight it. Botrytis wants free moisture and still air inside dense tissue. Powdery mildew is happy at moderate humidity and spreads on the leaf surface, which is why it shows up on broad, flat fan leaves that present a big target. It also spreads through the air as spores, so a single infected plant in a crowded veg room is a source that seeds the rest. The practical consequence is that veg mold control is mostly about plant spacing, canopy airflow, and scouting, with surface sanitation as the supporting layer. You are trying to deny the pathogen the dense, poorly ventilated canopy it needs to establish.
Target environment
Run veg on a descending humidity schedule. Early veg can sit at 60 to 70 percent while young plants are still transpiration-limited, then walk it down toward 55 to 65 percent as the canopy fills in and leaf area climbs. Hold vapor pressure deficit in the 0.8 to 1.2 range so the plant transpires steadily without the leaf surface staying wet. Temperature in the 72 to 80 F band keeps growth fast without pushing humidity demand higher than your dehumidification can answer.
Vapor pressure deficit is worth a plain-language gloss, because it is the number that actually governs whether a leaf surface stays wet. VPD is the difference between how much moisture the air is holding and how much it could hold at that temperature. Low VPD means the air is near saturation, the plant stops transpiring, and moisture lingers on leaf surfaces, which is what mold wants. High VPD pulls water out of the plant fast, which stresses it and can stall growth. The 0.8 to 1.2 window in veg keeps transpiration brisk and leaf surfaces drying quickly without stressing young plants. If you only track relative humidity, you are watching half the picture. Track VPD and you are watching the thing that decides whether a spore that lands on a leaf finds the wet surface it needs.
Canopy management
Airflow is a mold-prevention tool, not a comfort setting. Space plants so leaves from neighboring plants do not mat together, because leaf-to-leaf contact is a transmission bridge for mildew. Defoliate on time, late vegetative and the flip into flower, to open the canopy interior so air actually moves through it instead of around it. Run oscillating airflow below and within the canopy, not just above it. A leaf that dries within minutes of getting damp will not host a spore long enough to germinate.
The mistake here is treating airflow as a single big fan at the top of the room. Air moving across the top of a canopy does nothing for the stagnant, humid pocket that forms inside and underneath a dense plant, and that pocket is where trouble starts. You want gentle, continuous air movement through the canopy at multiple heights, enough that a wet leaf dries and no dead-air zone persists. Defoliation serves the same goal: removing the lower and interior fan leaves that will not get usable light anyway opens channels for air to pass through the plant. Done on schedule, it is a mold-prevention step as much as a yield step.
Sanitation cadence
Wipe benches, rails, and high-touch surfaces weekly during veg. Sterilize pruning tools between rows, not between rooms, so you are not carrying mildew from an infected plant to a clean one on your shears. The veg room is lower-stakes than flower, which tempts crews to let cadence slip here. Do not. Veg is where you prevent the flower problem, and a wiped-down veg room is cheaper than a lost flower table.
Tool hygiene deserves a specific callout because it is the most common silent transmission path in a veg room. A crew member defoliates an infected plant, then moves down the row with the same shears, and now every plant they touch has been inoculated. Sterilizing tools between plants, or at minimum between rows, breaks that chain. The same logic applies to hands and gloves. The cost is a few minutes and a dip station; the alternative is watching mildew march down a row you could have contained.
Catching mildew before it moves
Veg is also the stage where early detection pays the biggest dividend, because mildew caught on a handful of plants is a containment problem and mildew caught across a room is a crop problem. Scout the undersides and interiors of the largest fan leaves, where the first talc-like dusting tends to show, and pull or isolate any plant that reads positive rather than letting it stay in the row as a spore source. If you find it, step up airflow and tighten the humidity band immediately, because the conditions that let it establish will let it spread. The point of scouting in veg is not just to find infected plants, it is to buy yourself the days you need to act before the problem is roomwide.
Full protocol: start from the cultivation IPM expertise pillar for the stage-level SOP.
Stage 3: Flower
Dominant risk: Botrytis in dense colas
Flower is the stage that shows up in your related searches, bud rot and white mold on buds, because it is where the most expensive failures happen. Botrytis, gray mold, colonizes the inside of a dense cola where air does not move and moisture does not leave. By the time you see the brown, collapsing center of an infected bud, the pathogen has been working from the inside for days. An industry source describes the pattern well: "while it most often strikes at the end of a cannabis plant's flowering cycle, it can also develop near the drying process and rapidly spread to affect the entire crop, resulting in a devastating loss." Flower is where prevention beats treatment by the widest margin, because there is effectively no treatment for bud rot that saves the affected flower.
The reason bud rot is so costly is that it attacks the part of the plant you sell, at the moment that part is worth the most. A cola that looks perfect on the outside can be rotting from the core, where a dense, sticky, moisture-holding interior gives Botrytis a dark and humid place to work. The infection often starts at a point of damage or at senescing tissue inside the bud, then spreads outward until the surface finally shows it. That delay between infection and visible symptom is why daily scouting matters so much in flower: the earlier you find and remove an infected cola, the smaller the spore cloud it releases into the room.
Target environment
Flower runs the tightest humidity schedule in the lifecycle. Early flower can hold 50 to 60 percent, then pull toward 45 to 55 percent through late flower as buds swell and trap moisture inside the cola. Push vapor pressure deficit up to 1.2 to 1.5 in late flower so the plant keeps moving water out and the bud interior does not stay saturated. Keep temperature in the 68 to 78 F range, and mind the day-to-night swing: a room that drops fast at lights-out can condense moisture on cold bud surfaces, which is a bud-rot invitation.
The lights-out condensation risk is the one that catches experienced growers, so it earns its own paragraph. When the lights go off, room temperature drops, and if the dew point is close, moisture condenses on the coolest surfaces in the room, which are often the dense, transpiration-slowed buds. A film of free water on a cola surface overnight is exactly the condition Botrytis needs. The fix is active dehumidification that holds the humidity band through the dark period, and temperature management that keeps the lights-off drop gradual rather than steep. One widely cited bud-rot guide puts the principle simply: maintaining low relative humidity with active dehumidification prevents the conditions bud rot needs to develop. In late flower, your dehumidification running through lights-out is not optional.
Scouting cadence
From week five to harvest, inspect buds daily. Open the canopy and look inside the densest colas, not just the surface, because that is where Botrytis starts. A daily five-minute walk that catches one infected cola early and gets it bagged and removed can save the table around it. Scouting is the cheapest mold control you own, and in flower it is the one that pays the most.
Make the scouting repeatable so it survives a busy week. Assign it to a named person, give them a route through the room, and have them check the densest colas on the biggest plants first, since those are the highest-risk sites. When they find rot, the move is to bag the infected material in place before cutting, so you are not shaking spores loose over healthy buds on the way out. Then log it: where, which plant, how much. That log is both an early-warning signal if infections cluster and a record you can show when someone asks how you manage crop health.
Crop-adjacent air treatment and the EPA line
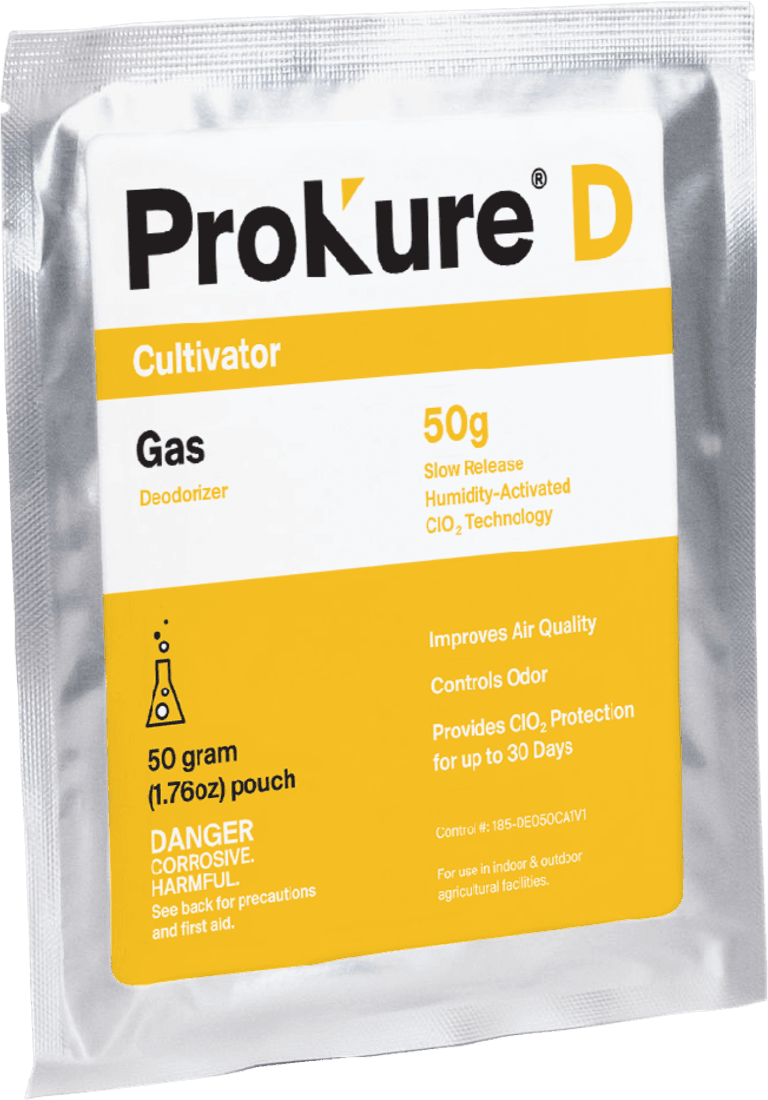
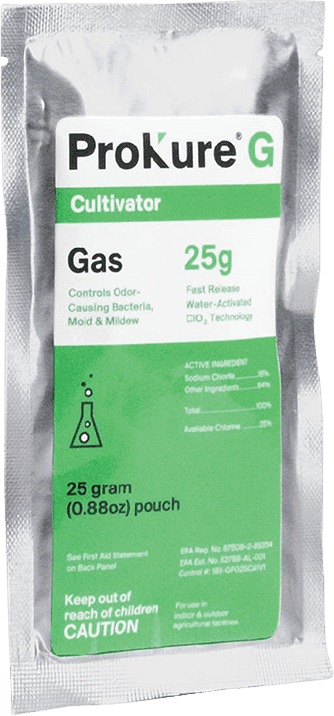
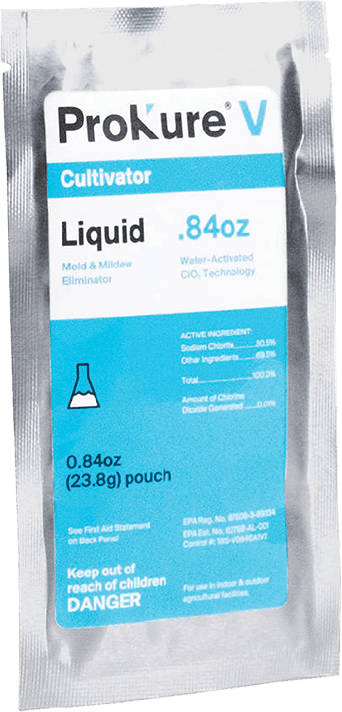
This is where product selection meets federal law, and where you cannot be loose. Any air or surface product used in a room with plants present must be labeled for that. The distinction is not a marketing preference, it is on the label. ProKure V is a liquid surface disinfectant that is suitable for use with plants in the room, so it fits surface work on benches and tools during flower. By contrast, ProKure G is a fast-release gas deodorizer whose label carries the disclaimer not for use with plants, crops, or feed, so it belongs in empty rooms between crops, not in an occupied flower room. Reaching for the wrong product in an occupied room is both an agronomic mistake and a label violation. When in doubt, the product label and the reference at prokuresolutions.com are the authority, not a blog.
The practical rule that keeps you clean is simple: read the label, match the product to whether plants are present, and never improvise. A surface disinfectant labeled as suitable for use with plants in the room can go on benches, tools, and hard surfaces while a crop is flowering. A gas product that says not for use with plants, crops, or feed is for the empty room, during turnover, with no crop present. This is not a detail a reader can safely guess at, and it is a place where most competing content is vague. Keeping the two straight protects both your crop and your compliance posture, which is why it belongs in the flower section rather than a footnote.
For a procurement or QA lead building an approved-vendor list, the same distinction is a documentation task. The plants-present label status, the EPA registration number where one applies, and the safety data sheet are the records you want on file before a product ever enters a room, and they are the records an auditor will ask to see. Keeping the surface disinfectant and the empty-room gas products clearly separated in your purchasing and your SOPs, each with its own label on file, means a crew member cannot accidentally stage the wrong product in an occupied room. The reference detail, labels, registration numbers, and safety data sheets, lives on prokuresolutions.com, and reorders run through shop.groclarity.com, so the buyer has one path for documentation and one for purchasing.
Full protocol: the flower-stage detail lives under the mold prevention protocols hub, and the air-side guidance sits in air quality management.
Stage 4: Dry and between-cycle room turnover
The dry room is where six-figure harvests fail
You can grow a clean crop for ten weeks and lose it in the first 72 hours of drying. The dry room concentrates everything that favors mold: a lot of wet biomass, in a closed space, holding still. Botrytis that was invisible on the plant can bloom across a rack as the tissue slowly releases water. The dry room gets less attention than flower and causes a surprising share of total losses, because the crew's guard drops right when the risk peaks.
The dynamic that makes the dry room dangerous is a surge in available moisture with no plant left to manage it. A living plant transpires and regulates; cut biomass just sits there releasing water into the room air. Load a dry room full of freshly cut plants and the humidity climbs fast, and if your dehumidification and air exchange cannot keep up, the room hits the band where mold runs. A latent Botrytis infection that never showed on the plant can now express across a whole rack, because you have handed it the still, humid conditions it was waiting for. This is why the dry room needs the same environmental discipline as late flower, plus a hard sanitation reset between loads.
Target environment
Hold the dry room at 55 to 62 percent relative humidity and 60 to 68 F, with enough air exchange that no pocket of still, saturated air forms around a dense rack. The goal is a slow, even moisture pull, roughly 10 to 14 days for most hang-dry programs, not a fast blast that case-hardens the outside while the core stays wet. A core that stays wet under a dry shell is a mold reservoir you will not find until the cure.
Case-hardening is the trap that a too-aggressive dry sets. Pull moisture off the outside of a bud too fast and the surface tightens while the dense interior stays wet, trapping moisture where you cannot see it. That bud passes a squeeze test, goes into a jar, and then molds from the inside during cure. A slow, even dry at a controlled humidity band avoids that by letting the whole bud release water at a similar rate. Patience in the dry room is a mold-prevention tactic, not just a quality one.
Between-cycle room turnover
The transition between harvests is its own protocol, and it is where the Facility Manager's real pain lives: between-cycle room turnover eating three to five days of downtime. Run it as a fixed sequence rather than a scramble. Strip the room of plant debris, because debris is the spore bank for the next crop. Clean soiled surfaces first, since a disinfectant cannot reach a pathogen under a layer of grime. Then disinfect hard surfaces, benches, rails, trays, drains, with a residue-free product. For an empty room, a fast-release gas treatment can reach surfaces a wipe misses, and because the room is empty the plants-present restriction does not apply. Finally, verify. Do not assume the reset worked.
The reason turnover eats days is that most facilities run it as an improvised cleanup rather than a documented sequence, so it is slow and the result is inconsistent. Written as a sequence, strip, clean, disinfect, treat, verify, it becomes a repeatable process a crew can execute the same way every time, which is both faster and more reliable. The empty room is also the one window where you can use a gas treatment to reach the surfaces a wipe misses, the undersides, the corners, the drain throats, because no crop is present to trigger the not-for-use-with-plants restriction. Sequencing the empty-room gas step correctly, after cleaning and with the room sealed and signed for safe re-entry, is what lets you compress turnover without cutting the parts that matter.
Verification as your data trail
The gap no competing page fills is proof. Swab counts on treated surfaces and an air sample before you bring the next crop in give you a before-and-after record. That record is two things at once: an operational check that your reset actually reduced the load, and a data trail you can show an auditor or ownership when they ask how you know your rooms are clean. Build verification into the turnover, not as an afterthought, and your room turn becomes defensible instead of hopeful.
Verification is also the step that lets you improve. Without a before-and-after number, you cannot tell whether a change to your turnover actually reduced the load or just felt thorough. Swab a set of fixed points before and after the reset, pull an air sample, and log the counts against the date and the crew. Over a few cycles that log tells you which steps carry the weight and where your resets fall short. For a multi-site operator, standardizing that verification across facilities is what turns a pile of individual rooms into a program you can defend to a regulator with the same evidence everywhere.
Full protocol: the dry-room and room-turnover SOPs branch from the mold prevention protocols hub.
Stage 5: Cure
Water activity is the real target
Cure is where growers relax and mold does not. The thing to control in cure is not room humidity, it is water activity inside the flower, the amount of free water a microbe can actually use. Target water activity in the 0.55 to 0.65 range. Below that, flower gets brittle and loses terpene quality. Above it, you have handed mold the moisture it needs on a product that is days from testing. Water activity is also what many state labs measure, so it is a compliance number, not only a quality one.
Water activity and moisture content are not the same thing, and the difference trips people up. Moisture content is how much water is in the flower by weight. Water activity is how much of that water is free and available for a microbe to use, on a scale from zero to one. Mold cannot grow below a certain water-activity threshold no matter how the flower feels to the hand, which is why labs and quality programs track water activity rather than just the squeeze test. Keeping it in the 0.55 to 0.65 band means you are below the line where most spoilage molds can establish, while staying above the point where the flower turns to dust. It is the single most useful number in the cure.
Vessel RH and burping cadence
Inside a jar, tote, or bin, hold 58 to 62 percent relative humidity. Burp vessels on a schedule in the first one to two weeks, opening them to release the moisture the flower off-gasses as it equilibrates, then taper as the readings stabilize. Put a hygrometer inside the vessel, not next to it, because the number that matters is the microclimate around the flower. A rack of jars that all read 58 to 62 percent and hold there is a cure that is doing its job.
Burping is simply managing the equilibrium between the flower and the air in the sealed vessel. Fresh-into-cure flower still has moisture to release, and in a closed container that moisture raises the vessel humidity until it either equilibrates or, if it runs high, supports mold. Opening the vessel vents that moisture and resets the clock, and doing it on a schedule in the first couple of weeks keeps the interior from spiking. As the readings settle into the band and hold, you can stretch the interval and eventually stop. Humidity-control packs can hold the band steady for larger or longer holds, which is useful for storage, but the hygrometer inside the vessel is still the instrument that tells you the truth.
What moldy cure looks like
Know the signs before a customer or a lab does. White, fuzzy growth on the flower surface, a dusty gray cast inside a dense nug, or a sharp ammonia or musty smell when you open a jar all say stop. Moldy cured flower does not get rescued, it gets quarantined and pulled from the saleable lot, and the batch around it gets re-tested. The point of tight cure discipline is to never reach that sentence.
The ammonia smell deserves a specific mention because it is an early signal crews often misread as normal cure funk. A sharp, pungent ammonia note usually means anaerobic bacterial activity from flower jarred too wet, which travels alongside mold risk. If you open a vessel and get that smell, treat it as a flag to check water activity and vessel humidity on that lot immediately, not as a sign the cure is coming along. Catching it early can save the lot; ignoring it rarely does.
Why cure discipline protects the test
Cure is the last stage where you still have easy control before the lab result, and a lapse here can undo a clean grow. Flower that molds in the jar does not just fail your internal quality bar, it fails the microbial test that gates the sale, and it does so after you have already spent ten weeks of input and the cost of the dry. The discipline is cheap relative to the stakes: a hygrometer in every vessel, a burping schedule for the first weeks, a target water-activity band, and a quick sensory check at each burp. Treat the cure room with the same seriousness as the flower room, because the product is now worth more and the margin for a mistake is smaller.
Full protocol: cure-stage detail sits under the mold prevention protocols hub.
Stage 6: Storage and pre-sale compliance
State pre-sale thresholds vary, and that is the whole risk
Storage is where a crop that passed every internal check can still fail the test that counts. State pre-sale microbial limits are not uniform. Total yeast and mold count thresholds differ by market, some states gate on a total yeast and mold count while others run species-specific tests, and several enforce a zero-tolerance line on Aspergillus regardless of the general count. For a single-state operator this is one rulebook. For a multi-state operator it is several, which is exactly the pain a Cultivation Director at an MSO carries: inconsistent IPM protocols across state footprints and state-by-state regulatory variance. A lifecycle protocol that is standardized across facilities, with per-state thresholds documented at the storage stage, is how an MSO stops relying on tribal knowledge in each room.
The variance is not a minor compliance detail, it is a design constraint on the whole operation. A total yeast and mold count limit and a species-specific Aspergillus test are different tests measuring different things, and a lot can pass one framework and fail another. If you operate in several states, the only sane way to manage that is to build to the strictest standard in your footprint and document which test each market runs, so a lot moving between facilities is never a surprise at the lab. That documentation lives at the storage stage because that is the last control point before the test, and it is where an auditor will look for your pre-sale discipline. For an operator standardizing across sites, the storage-stage compliance record is the piece that proves the protocol is actually the same everywhere, not just on paper.
Vault and bulk storage humidity
Keep packaged and bulk flower below 60 percent relative humidity in the vault, at 60 to 70 F, out of light. The failure mode here is slow and quiet. Flower that tested clean can re-contaminate or let a low pathogen load climb if it sits in a humid vault long enough. Palletized bulk flower is especially exposed, because the center of a shrink-wrapped pallet holds its own warmer, damper microclimate that the room reading never shows.
The pallet-center problem is the one that bites operators who think a clean vault reading means clean product. A room hygrometer tells you the air in the aisle, not the microclimate inside a tightly wrapped pallet where airflow is nil and any residual moisture has nowhere to go. That center can run warmer and damper than the room, which is enough to let a low load climb over weeks. The defenses are keeping product moving rather than sitting, monitoring conditions at the product level for long holds, and not treating a passing test as a permanent state. Flower is a biological product; storage either holds it or slowly degrades it.
Mycotoxin risk on already-tested flower
The risk that storage pages skip entirely is mycotoxin development after the test. A passing TYMC does not freeze the product in time. If storage conditions let mold grow on already-tested flower, that flower can carry a load, and in the case of some Aspergillus species, mycotoxins, that your pre-sale test never saw. Storage is not a holding pattern, it is an active control point, and it deserves the same humidity discipline as flower.
Mycotoxins are the reason the Aspergillus zero-tolerance rules exist in the markets that have them. Some Aspergillus species can produce toxic compounds that pose a real inhalation and ingestion risk, and those compounds do not go away on their own. A lot that developed an Aspergillus load in a humid vault after testing is not just a count problem, it is a safety problem, and it is exactly the kind of failure that triggers a recall and a regulatory finding. Treating storage as an active control point, with the same humidity discipline and the same logging you apply upstream, is how you keep a passed test meaningful all the way to sale.
The data trail for audit, and what the system adds up to
Log it. Vault humidity and temperature on a schedule, lot-level test results, and the sanitation record for the storage space together form the audit trail that answers an inspector's real question: not did it test clean once, but can you show the conditions held. Across all six stages, the thread that ties the protocol together is the same: control the environment, sanitize on a cadence, verify the result, and keep the record. Surface chemistry differs by stage because the label does, products that carry the not for use with plants, crops, or feed disclaimer belong in empty rooms, and the plant-safe surface disinfectant belongs where crops are present. Match the product to the stage and to its label, and the system holds together from clone to sale.
What GroClarity recommends across all six stages is not a product you bolt on, it is a habit you build into the lifecycle: environmental control sized to the stage, sanitation on a written cadence, verification that produces a number, and a record that survives an audit. Cultivation-specific IPM expertise is what connects those four into one program rather than four disconnected chores, and the ClO2 product line gives you the surface and air tools to execute each stage, a plant-safe liquid disinfectant for occupied rooms and gas treatments for the empty-room resets. For an owner weighing the cost, the math is the point: one failed test on a mature harvest outweighs a year of disciplined prevention, and prevention is an investment in a crop you already paid to grow, not a line item to trim.
For product specifications, labels, and safety data sheets, the authority is prokuresolutions.com, and the ProKure V liquid disinfectant overview explains the surface-disinfection half of the system. To buy or reorder, use shop.groclarity.com.
Frequently asked questions
These are the questions readers ask alongside this one, answered straight, then pointed back to the stage where the real work happens.
That is the lifecycle. Not one humidity number and one cleaning habit, but six connected protocols that each own a different pathogen, a different band, and a different cadence, tied together by one rule: tighten as the crop ages, because the cost of a miss climbs the whole way. Start from the summary table, find the stage your crop is in right now, and work from there.
If you take one operational idea from this page, make it the handoffs. Most mold losses do not happen because a grower ignored a stage, they happen at the seam between two stages, where the environment changes and the biology lags. The clone that was never stepped down out of the dome. The flower table that arrived in the dry room carrying a load nobody reset. The cured jar that read fine and then sat in a humid vault. Watch the seams, carry the record across them, and the six stages stop being six separate fights and become one protocol you can run the same way every cycle, in every room, and defend to anyone who asks.
Related resources