
The Head Grower's IPM Protocol: A Field-Tested Framework for Multi-Room Cannabis Cultivation
A head grower's IPM protocol is the documented version of what your team already runs: a scouting cadence they hold to, written action thresholds, between-cycle sanitation that leaves no residue near plants, HLVd tool discipline across every shift, and an air-quality evidence trail an auditor can actually read. It is not a plan-builder tutorial for someone starting their first grow. It is the operating protocol for an established multi-room facility where a positive mold test on a mature crop is a six-figure event. This page is written to the operator who owns the SOPs, not to the beginner still deciding what IPM is.
If you are still building your first plan, the plan-builder guide is the better starting point, and the cross-links below hand you off. Everyone else, here is the protocol.
Who this protocol is for, and the fifth pillar most guides skip
You run an established operation: multiple rooms, mature plants in the ground, a team executing daily, and harvests already worth six figures before they are tested. You already know IPM. What you want is the sharper version of the protocol you have.
Most published guides give you a framework and stop. The #1 ranking guide for cannabis IPM, from planacan.io, lays out a solid five-step model and names the real stakes: as that guide puts it, "Pests will find your grow. The only question is whether your team has a documented plan when they do." True. Where it stops is the head-grower part: the chemistry decision, the compliance moat, and the evidence file.
So this protocol runs on five pillars, and the fifth is the one that separates a head grower's program from a beginner's plan. The first four are the familiar control types: cultural, biological, physical or mechanical, and chemical. The fifth is a documented evidence trail: the records that prove to ownership and to a state auditor that the protocol ran, the air stayed clean, and the chemistry on the shelf was compliant. A beginner runs four pillars and hopes. A head grower runs five and can prove it.
The pest and pathogen threat map
Before the cadence, the targets. A head grower's threat map has three tiers, and the order matters because the response differs.
Arthropods
Spider mites, thrips, aphids, fungus gnats, and whiteflies are the daily scouting targets. They move room to room on clothing and carts, they reproduce fast, and they are what your sticky cards are counting. These are the pests a documented threshold system is built for, because you catch them on a card before you catch them on a plant.
Fungal pathogens
The molds are what fail a pre-sale test, so they drive the sanitation half of the protocol. Powdery mildew, Botrytis, Fusarium, and Pythium all thrive in humid, stagnant conditions. Botrytis is the fast one: per the planacan.io guide, Botrytis "destroys inflorescences fast; risk spikes above 70% RH at 17 to 24 degrees C." That single environmental fact is why humidity control and air quality sit at the center of this protocol, not off to the side.
Hop Latent Viroid
HLVd is the silent yield killer, and it is the one a head grower underestimates until a run comes up small with no visible cause. The numbers are stark. Per planacan.io, "Hop Latent Viroid (HLVd) hits 90% of California cannabis facilities and suppresses yields before symptoms appear," with a 2021 survey reporting "90% of California cannabis-growing facilities were contaminated" and Canadian commercial data finding "25.6% average incidence across nearly 16,000 samples." The yield damage is measurable: planacan cites "documented reductions of 12 to 42% in plant height, fresh weight, and inflorescence stem length." HLVd spreads mechanically, on pruning tools, which is why tool sterilization is a protocol pillar and not a nicety.
Scouting cadence and action thresholds
A protocol is only as good as the cadence a shift-based team actually executes. Write it so the newest crew member can run it.
The cadence
Daily: a walkthrough of every room, looking at the undersides of leaves and the canopy interior, not just the tops. Budget a fixed number of minutes per room so it does not get skipped on a busy day. The daily pass catches arthropods early and flags any plant showing stress.
Weekly: sticky card counts. Yellow cards for fungus gnats, aphids, and whiteflies; blue cards for thrips. Log the counts by room so a rising trend is visible before it is a problem. A card count is your action-threshold data, so it has to be written down, not eyeballed.
At clone intake: inspect every incoming plant before it touches the room. Clones are the most common way a pest or a viroid walks into a clean facility. This is also the natural point to pull tissue for HLVd testing on incoming stock.
At cycle boundary: a full inspection of the empty room before the next crop goes in, which is the handoff into the sanitation protocol below.
Action thresholds worth documenting
Here is an uncomfortable truth the beginner guides gloss over: there are no standardized, published action thresholds for cannabis the way there are for field crops. The thresholds you run are the ones your facility documents for itself. That is not a reason to skip them; it is the reason to write them down, because an undocumented threshold lives in one grower's head and leaves with that grower.
Build a facility-specific threshold framework: a card count or a percentage of plants showing a pest that triggers a defined escalation. Define the escalation by pest category, so the team knows that X thrips per blue card means a biological release and a different number means a chemical control from your state-approved list. The point is not the exact number; it is that the number is written, owned, and the same across every shift.
Prevention and the control ladder: least-risk first
Prevention is where a head grower's protocol earns its keep, because the cheapest pathogen is the one that never enters the room.
Tool sterilization for HLVd
Because HLVd spreads on pruning tools, tool discipline is non-negotiable. Sterilize between plants, not between rooms, because a single contaminated cut carries it forward. The payoff is documented: planacan cites a 2024 pathogen-management review finding that "regular RT-PCR testing combined with removal of infected stock reduced HLVd frequency from 22% to 1% in stock populations." Pair tool sterilization with RT-qPCR testing of stock and the removal of positives, and log tool-sterilization compliance the same way you log everything else, because a 20-person team will not hold a standard that is not written and checked.
Movement, pressure, and debris
Control movement between rooms: dedicated tools and, where possible, dedicated staff per zone. Manage air pressure between zones so air flows from clean to dirty, not the reverse. Remove plant debris on a fixed cadence, because dropped leaf litter under a bench is a mold reservoir. None of this is exotic. All of it is the discipline that a documented protocol enforces and an undocumented habit lets slide.
Between-cycle sanitation: the residue problem no one names
This is the gap in every guide ranking for this query, and it is the decision a head grower actually loses time on. The top guides say "sanitize between cycles" and "sterilize tools" and then never name the chemistry. A head grower choosing a product gets zero decision support. So here it is.
Why bleach and quats fight you in a grow room
Bleach and quaternary ammonium compounds disinfect, but they carry costs a room full of plants cannot absorb. Bleach fumes force the crew to evacuate, and both bleach and quats leave residue that has to be rinsed before plants return, because residue near the crop is exactly what you are trying to avoid. That sequence, evacuate, dwell, rinse, is what turns a turnover into three to five days of downtime. The residue is also why growers stop trusting their old sanitizer: a film on a trellis or a tray is a film the next crop touches.
Chlorine dioxide as the residue-free option
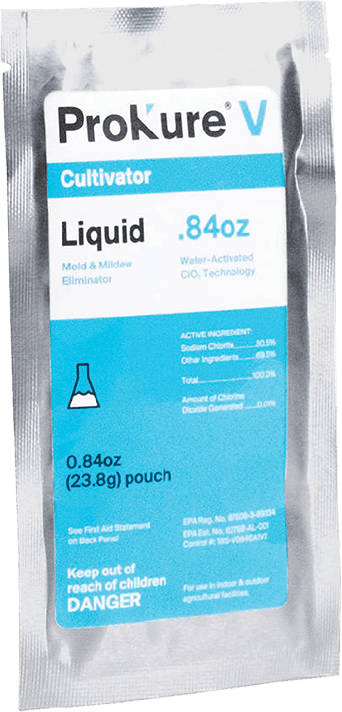
Chlorine dioxide (ClO2) is the chemistry that answers that specific problem, and the ProKure line splits it into three jobs. For hard-surface disinfection, ProKure V is a liquid, water-activated ClO2 disinfectant, EPA registered under EPA Reg. No. 87508-3-89334, used on hard non-porous surfaces at 100 ppm for a 10-minute contact time. It kills mold and mildew, leaves no residue, and is suitable for use with plants in the room, applied to surfaces rather than foliage. No residue means no rinse step and nothing left where plants return, which is the direct counter to the bleach-and-quat problem.
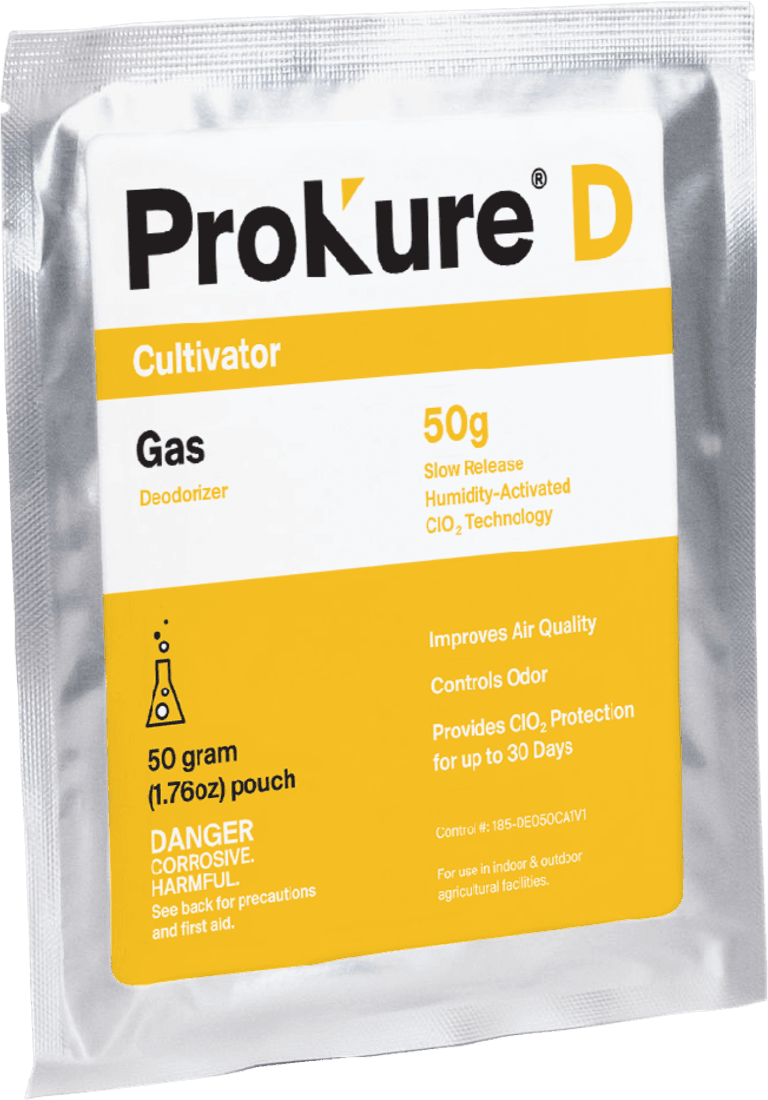
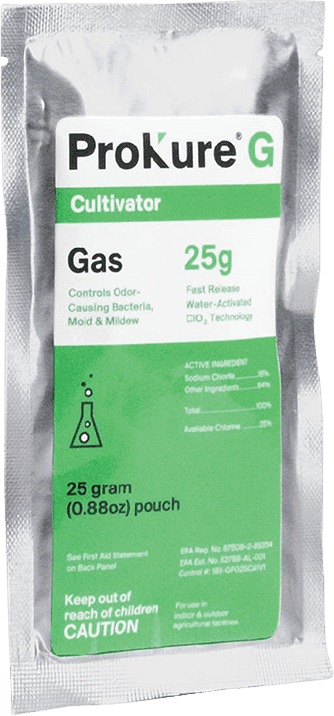
For the air half of the room, which is where most of the volume and most of the risk sit, there are two gas-phase tools. ProKure G is a fast-release gas, EPA Reg. No. 87508-2-89334, used in an empty room for a rapid air reset in roughly 4 to 6 hours with a venting step before re-entry; its label carries the verbatim restriction "Not for use with/on plants/crops/feed," so it is an empty-room step only. ProKure D is a slow-release gas that provides ClO2 protection for up to 30 days, improving air quality and controlling odors while filling the vertical air column and reaching surfaces a spray cannot. One hard compliance line on D: it is not an EPA-registered product, and the required disclaimer is verbatim, "Not an EPA-registered product and not labeled for sale as a pesticide under 40 CFR." Keep each product's claim, form, and disclaimer matched to that product and never borrowed across.
Turnover time
The practical head-grower payoff is downtime. A bleach turnover spends hours on evacuation and rinsing; a ClO2 protocol built on residue-free surface disinfection plus a gas-phase coverage step deletes both the evacuate-for-fumes step and the rinse-the-film step. The exact hours depend on your room volume and HVAC, but the structural win is fewer evacuations, no rinse, and surfaces a sprayer could never reach handled by the gas. For a head grower counting harvests per year, every day off turnover is a day of production.
Climbing the control ladder in order
IPM is a ladder, and a head grower climbs it in order. Jumping to a chemical first is the beginner reflex that a documented protocol prevents.
Cultural controls come first: the sanitation, spacing, movement, and debris rules above. Biological controls are next: predatory mites, parasitic wasps, and microbial options such as Bacillus subtilis for fungal pressure. Physical and mechanical controls layer in: sticky cards for monitoring and knockdown, plus environmental hardware. On filtration, planacan's figure is worth holding to, "MERV 13 air filtration captures at least 85% of particles in the 1.0 to 3.0 micron range and 90% of particles 3.0 to 10 microns," which lowers the airborne spore load the sanitation step cannot reach. UV-C has a cited role too: per planacan, "daily UV-C irradiation at 3 to 6 mJ/cm2 for 3 to 5 seconds measurably reduces powdery mildew development," and nighttime application outperforms daytime because spores lose their light-activated repair in the dark.
Chemical controls are the last rung, and the rule is absolute: only products on your state's approved list, used exactly per the EPA label. The label is the law.
EPA compliance, the moat a head grower can build
EPA compliance is the biggest worry most operators name, and the top guides treat it as a footnote. Treat it as a moat instead.
Start from the fact planacan states plainly: "No pesticide product is federally registered for use on cannabis. Each state sets its own approved-use criteria." So your compliance work is state work. Planacan's state read is a useful reference: California's Department of Pesticide Regulation "released approximately 100 approved products in 2024," Oregon "maintains its own updated guide list of allowable pesticides," and Colorado "prohibits any pesticide use inconsistent with product labeling."
The operator skill is reading a label before you buy. When a sanitizer label carries "Not for use with/on plants/crops/feed," that is a site-of-use restriction that tells you the product is an empty-room or off-crop product, which is exactly why that disclaimer rides with ProKure G and why ProKure V, the surface disinfectant, carries its own distinct plant-in-room allowance instead. Keep your registration numbers straight in the file: ProKure V is 87508-3-89334, ProKure G is 87508-2-89334, and ProKure D is not EPA-registered and carries the 40 CFR disclaimer rather than a number. For the master label and SDS behind each, the authoritative source is prokuresolutions.com. If you run across state lines, the variance itself becomes a standardization problem worth its own protocol.
The auditor-ready evidence file
This is the fifth pillar, made concrete. A head grower who runs a perfect protocol and documents none of it still fails the audit, because an auditor reads records, not routines.
Build four things as you go. First, an SDS binder with the current safety data sheet for every product in the facility. Second, your EPA registration numbers on file, with D's non-registered status noted explicitly so a missing number reads as intentional, not sloppy. Third, treatment logs at the batch level: date, time, room, operator, product, dilution or pouch size, and contact time, one line per application. Fourth, an air-quality data trail: a sampling cadence and a log format that shows airborne pathogen load trending over the cycle. Over a few runs, that air-quality archive becomes the single strongest piece of evidence that your prevention protocol works, which is exactly what ownership and a regulator both want to see. GroClarity's air-testing service exists to generate that trail if you do not want to build the sampling program in-house.
Running the protocol across a team, and when a test fails
The crisis playbook: a positive test on a mature crop
Every guide is pre-emptive. None answers the question that actually keeps a head grower up: the mold test came back positive on a crop worth six figures, now what.
First 24 hours: isolate the affected batch, stop any movement that could spread it, and pull a chain-of-custody retest before you make an irreversible call, because a single lab result can be a sampling artifact. Document everything from the first hour, because the paper trail is what protects the license. Then move to remediation options, which are a protocol of their own; the remediation guide goes deeper on the recovery workflow. The lesson a crisis teaches, every time, is that the prevention protocol and the evidence file above are cheaper than the crisis, by a wide margin.
Standardizing execution across a multi-room team
A head grower's final job is making the protocol survive a shift-based team. Put daily protocol cards on the grow floor so the standard is visible where the work happens. Use a shift-handoff log so the next crew knows what the last crew saw. Hold a weekly head-grower review of the scouting counts, the treatment logs, and the air-quality trend, because the review is what turns a stack of logs into a decision. The protocol is not the document; it is the document plus the cadence of checking that it ran.
FAQ
The questions a head grower and their team ask most, answered straight.
If your real stage is earlier, building a first plan, or narrower, turnover only or multi-state variance, the cross-linked siblings take those intents. This page keeps the established-operator protocol.
Related resources