
A mold checklist for a cannabis facility manager is a cadence, not a single clean. You walk the rooms daily and log a hygrometer reading. You deep-inspect weekly. You service the HVAC monthly. You sanitize the whole room between cycles with a sanitizer chosen for residue and re-entry, not just kill power. And you write down every step so a state inspector can see the routine held. That is the difference between a grower's prevention guide and a facility manager's operational SOP: the facility manager's version is scoped by role, cadence, chemistry, and the paper trail. This checklist is built to print, laminate, and hang on the wall.
Why this checklist exists (and who it's for)
This is written for the Facility Manager at a single-room or small multi-room grow. You are the person who owns room turnover, sanitation scheduling, and the day-to-day condition of the space. You already know the specific pains, because you live inside them. Between-cycle turnover eats three to five days of downtime you cannot afford. Bleach fumes force the crew to evacuate a room that should be getting cleaned, not emptied of people. You do not have a residue-free surface option you trust near plants. And when ownership or a state inspector asks how you know the sanitation worked, you do not have a data trail to point at.
Most of the mold content online does not solve any of that. It is written for home growers worried about one plant, or it is a generic maintenance card from a software vendor. This page is the operational reference instead: a role-scoped, cadence-based checklist with the chemistry and documentation a cannabis facility actually needs.
The distinction matters more than it sounds. A grower-facing guide tells you to control humidity and move the air. True, but incomplete for someone running a commercial room. You are not just growing a plant. You are running a space that has to pass a state microbial test, satisfy an auditor, and turn over fast enough to keep the harvest calendar on schedule. The humidity advice is the first ten percent of your job. The other ninety is cadence, chemistry selection, HVAC, and documentation, and that is what this page covers.
Two quick routes before you start. If you already have a positive microbial test result, this page is not your first stop; the remediation path is a different workflow, and you want the mold-load remediation guidance for a batch in trouble. If you run several facilities and need this checklist to look identical across a state footprint, the multi-state standardization approach is the version you want so your SOP does not fork from site to site. And if you are building the ROI case for ownership, the cost-of-a-failed-test math belongs with the ownership conversation, not here.
Everything below assumes you want to prevent the failure, not react to it. Prevention is cheaper, and it is almost entirely about holding a handful of conditions steady and logging that you did. The rest of this page gives you the four problems you are actually fighting, the setpoints that starve them, the cadence that catches them, the chemistry that handles them without a residue penalty, and the paper trail that protects the business when something slips anyway.
The four mold problems a cannabis facility manager is actually preventing
Before the cadence, name the enemy. Four distinct mold problems show up in a cannabis facility, and they live in different places, which is exactly why a single monthly wipe-down does not catch them all. If your checklist only looks at the plants, it misses two of the four.
Powdery mildew (leaves and stems)
Powdery mildew is the white, dusty coating on leaves and stems that looks like someone dusted the plant with flour. It is a surface-level problem you can often see on a walk-through if you are looking for it, which is why the daily visual scout matters. It spreads fast in still, humid air and tight canopy, so it is as much an airflow and spacing problem as a chemistry problem. If you are seeing it recur in the same corner of a room, the fix is usually air movement and canopy spacing in that spot, not a stronger spray.
Botrytis, gray mold, and bud rot (interior of dense colas)
Botrytis, also called gray mold or bud rot, is the one that rots flowers from the inside out and leaves gray or brown mush where solid bud used to be. It is the most dangerous because it hides. It starts deep inside thick colas where the air is wetter than the room and is often invisible until it has already spread. That is not a guess: a research analysis of microbial hazards during cannabis harvesting and processing found that Botrytis cinerea, a plant pathogen of cannabis that causes gray mold, was the most common fungus in the samples studied (per the National Library of Medicine, PMC article PMC6314012). Your daily scout has to include breaking open or at least closely inspecting the interior of a random sample of dense colas, because the surface can look clean while the inside is rotting. Late flower is when this one bites, because that is when the colas are densest and the room should be driest.
Aspergillus and other post-harvest storage molds (dried and cured flower)
The third group appears after harvest, on flower that was dried or cured while still too wet. Aspergillus species are the concern here because several of them appear on state microbial testing panels, and a positive can fail a batch at the finish line, after all the cultivation cost is already sunk. The drying and curing room is where this mold is won or lost, which is why this checklist treats that room as its own sanitation zone, not an afterthought. A room that grew clean flower can still fail its test if the dry room was damp or dirty.
HVAC-borne mold (drip pans, filters, duct interiors)
The fourth problem is the one the cannabis mold guides almost never mention: the HVAC system itself. A drip pan holding standing water, a filter staying damp, or a duct interior with accumulated moisture seeds mold into the return air and carries it across every zone the system serves. You can sanitize every surface a grower thinks about and still lose the room because the air handler is reinoculating it on a loop. This is where a facility manager's checklist has to go beyond the plant, and it is the single most common reason a room that looks clean keeps failing.
The environmental setpoints that make mold impossible
Mold is a moisture problem first. Every mold and mildew that hits cannabis needs humidity to take hold, so most of the battle is holding environmental setpoints steady and logging that you did. The numbers below are the agronomic baseline; the facility-manager addition is the hygrometer placement and the logging cadence that proves the room stayed in range. Setpoints you do not measure are setpoints you do not actually have.
Humidity targets by stage
Humidity drops as the plant matures, and the late-flower window is the riskiest. A practical set of stage targets runs roughly: seedling 65 to 70 percent, vegetative 50 to 70 percent, early flower 40 to 50 percent, and late flower below 45 percent (stage targets as published in a widely cited grow guide at barneysfarm.com). The facility-manager layer is placement and logging: put a hygrometer at canopy height in each room, not by the door where the reading lies, and log the reading at the same time each shift so the trend is visible before it becomes a problem. A single reading tells you the moment. A logged trend tells you the room is drifting two days before mold would. If you run multiple rooms at different stages, each room gets its own target and its own log line, because a veg setpoint in a late-flower room is a bud-rot invitation.
Airflow targets
Airflow is the cheapest insurance you have. Moving air dries surfaces and breaks up the still, damp pockets where spores settle. A useful target cited in cannabis airflow guidance is keeping air moving at roughly half a meter to one meter per second across the plants. For the facility manager, that translates to a daily check that every oscillating fan is actually running and aimed so every leaf flutters gently, with no dead corners. A fan that quietly died overnight is a mold event waiting three days to happen. Pay special attention to the center of dense plants and the understory, because those are the dead-air pockets the perimeter fans never reach.
Temperature and the condensation trap
Mold does not only care about humidity; it cares about where water condenses. A sharp night-time temperature drop lets moisture condense on cooler bud surfaces even when the daytime humidity reading looked fine. Hold the day-to-night temperature delta disciplined, and watch the coolest surfaces in the room, because that is where condensation lands first. Log the high and low, not just a spot reading. A room that swings ten degrees at lights-off is making dew on the coldest colas whether or not your daytime hygrometer ever flagged it.
The drying room as its own zone
The drying and curing room is a separate sanitation zone with its own rules. A reliable target is the sixty-sixty approach: dry in a dark space at around 60 percent humidity and 60 degrees Fahrenheit, with gentle air circulating but never blowing straight onto the flowers, which usually takes seven to fourteen days (drying spec as described at barneysfarm.com). Because this room handles flower that is most vulnerable to storage mold, it gets its own between-cycle sanitation and its own log line. Do not fold it into the general grow-room routine. The dry room is the last place a batch can fail before it moves to sale, so it deserves the same sanitation discipline as the flower room, run on its own schedule tied to each drying batch.
The cadence checklist: daily, weekly, monthly, per-cycle, and annual
This is the heart of the page. Mold does not keep office hours, so the checklist runs on five overlapping rhythms. Each rhythm catches what the faster one misses. Print this section, split it by cadence, and assign an owner to each.
The daily checklist (per room, per shift)
The daily list is short on purpose. It is the walk-the-rooms routine, and it should take minutes per room so it actually gets done every shift. Start with a visual scout of the interior of a random sample of dense colas, because surface-clean does not mean rot-free; you have to look inside, not just at the plant. Note any new brown, gray, or white powder with the room and plant tag, every time, even if you are not sure. An uncertain note today is a caught problem tomorrow. Log the hygrometer reading at canopy height in a fixed format so the log is scannable later: date, time, room, reading, initials. Do a floor and drain visual for standing water, which is a mold incubator and a moisture source the HVAC check will not catch. Verify fan operation in every room, confirming each oscillating fan and exhaust is running and aimed correctly. That is the whole daily list: visual scout, hygrometer log, floor and drain check, fan verification, and a note on anything new. Five items, every shift, logged.
The weekly checklist
The weekly list is the deeper look, the one that catches what a fast daily walk misses. Do a deep visual under tables, in corners, and inside storage cabinets. The number-one search result for grow-room maintenance tells facility teams to check unused pots and soil for signs of mold growth and to look under tables, in corners and inside storage cabinets (getmaintainx.com). That advice is correct as far as it goes, so keep it, and do it weekly rather than only monthly, because a cannabis facility runs hotter and wetter than the generic grow room that card was written for. Inspect everything adjacent to the watering system, where mold loves the margins of irrigation: drip lines, reservoir edges, and the wet zone around emitters. Treat a biofilm or slime there as an early warning, not a cosmetic issue. Check unused pots and stored growing media, because stored media is a reservoir for spores that reinfect a clean room. Sanitize tools, shears, and trellis clips, since anything that touches multiple plants moves mold between them; log the product and concentration used so the weekly tool cycle is provable. Finish with an HVAC filter visual and moisture check: you are not replacing it weekly, but a damp or fouled filter is a mold factory feeding the whole zone, and you want to catch it before the monthly swap.
The monthly checklist
The monthly list is the equipment-and-air list, and it is where a cannabis facility manager adds the items the generic maintenance card skips. Replace the HEPA or air filters: make air filter replacement a monthly routine, because filters might appear clean but accumulate microscopic airborne pollutants that have a negative impact on your crop, and HEPA filters are recommended for most grow room ventilation equipment (getmaintainx.com). Log the replacement date so the cadence is provable. Clean light fixtures and reflectors, ideally outside the grow room so you are not shedding dust back into the space, which also improves canopy penetration and reduces shaded, humid understory. Drain and clean the HVAC drip pans, the item the cannabis guides miss: in commercial facility management, HVAC drip pans, filters, and ductwork are a recognized path that spreads contamination building-wide, and in a grow room a drip pan holding standing water seeds mold into the return air across every zone. A monthly drain-and-clean with the date logged closes a path that resanitizing the plants cannot. Inspect ceilings and walls near plumbing penetrations, where staining is a hidden-moisture tell you want to catch before it becomes a wall-cavity problem. Log a monthly air-quality reading per zone for the auditor file; over time that becomes the data trail proving the environment stayed controlled.
The per-cycle (between-harvest) turnover checklist
The between-cycle turnover is the single highest-leverage mold prevention moment you have, and most facilities treat it as dead downtime to minimize rather than a prevention event to execute well. Reframe it. The three-to-five-day window between harvests is when the room is empty, every surface is reachable, and you can reset the space to zero before the next transplant seeds a new problem. Run a full room sanitation sequence: strip the room, pre-clean visibly soiled surfaces, then disinfect every hard surface including walls, floors, benches, and drip pans. The incumbent advice here is the exact thing to improve on. The top-ranked maintenance card says to use a bleach solution or hydrogen peroxide to sterilize everything from grow tents and reflectors to equipment and unused pots (getmaintainx.com). Bleach and hydrogen peroxide will kill, but they are the chemistries the facility-manager persona is trying to move away from: bleach fumes force the crew out of the room, and residue is a problem near the next cycle's roots. Pick a surface disinfectant that is EPA-registered for the surfaces and kill claims you need, that leaves no residue, and that does not force a long evacuation. Document the re-entry interval and any off-gassing considerations straight off the product label, then sign off the turnover in a log line an auditor can read: room, date, product, concentration, applicator, re-entry time. A turnover that is not logged did not happen as far as an inspector is concerned. The full walkthrough on shortening this window lives in the between-cycle turnover guidance.
The quarterly and annual deep-clean items
Some items do not fit a daily or monthly rhythm and belong on a longer cycle. Inspect the duct interior quarterly or annually, because that is where long-term accumulation hides and where a building-wide source can establish quietly. Review genetics with the cultivation lead: if one dense strain keeps failing on total yeast and mold, that is not purely a sanitation problem, and a quarterly review keeps the checklist honest about what sanitation can and cannot fix. Refresh the sanitizer inventory and the SDS file, confirming every product is in stock, in date, and has a current safety data sheet, because an expired product or a missing SDS is an audit failure waiting to happen. Audit the vendor and procurement path so you can reorder reliably with account-level pricing and documentation in order; the audit-readiness side of this, SDS and EPA label retrieval, is owned by the procurement and QA workflow, so hand that reader there.
EPA-registered chemistry: what a facility manager needs to know
This is the section the top search results miss entirely, and it is the single biggest reason the facility-manager persona lands on this query. Here is the plain-language version, because the stakes are federal-law stakes, not housekeeping.
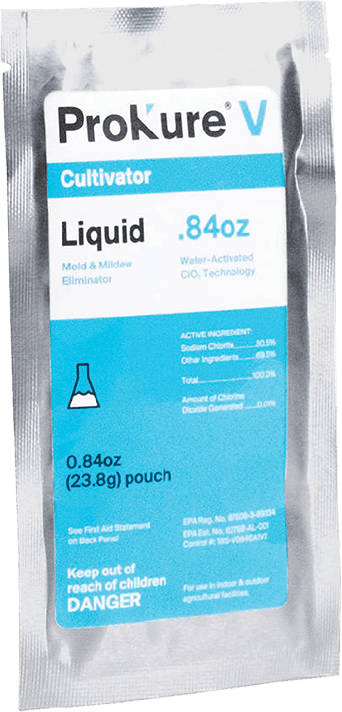
EPA registration means a surface sanitizer or disinfectant has been reviewed and registered for specific surfaces, organisms, and use patterns, and it carries an EPA registration number you can look up. For a product making kill claims against mold and mildew on hard surfaces, that registration is what separates a real disinfectant from a cleaner. ProKure V, for example, carries EPA Reg. No. 87508-3-89334. When an inspector or your own QA lead asks what you are using and whether it is registered for the job, the number is the answer. Keep it on file alongside the label and the SDS for every product in the checklist.
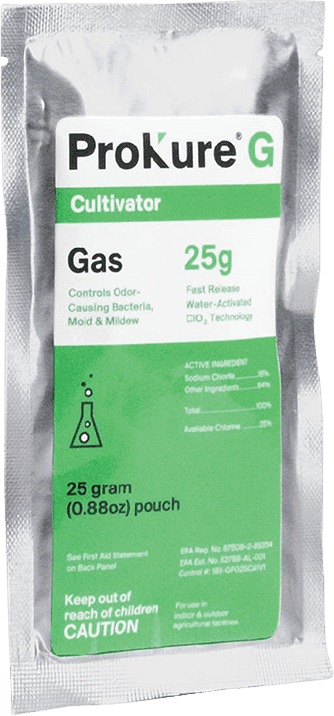
The disclaimer to understand is Not for use with plants/crops/feed, which appears on some ClO2 products such as ProKure G, a fast-release gas deodorizer used in an empty room. That disclaimer tells you exactly what a product may and may not touch. A product carrying it is for the empty room and its surfaces or air, not for application onto the plants, the crop, or feed. Reading and honoring that line is not optional; under federal law it is a violation to use a product in a manner inconsistent with its labeling. A product that is suitable for use with plants in the room, like ProKure V for surfaces, is a different case, and the label is what tells you which is which. The safest habit is to assume nothing from the brand and read the registration status and the use directions on every label before it enters a room.
Bleach and quaternary ammonium (quat) are the default chemistries in a lot of grow-room advice, and they carry the residue problem. Bleach off-gasses and forces crew evacuation; both bleach and quat leave surface residue that can touch the next cycle's roots. The facility-manager move is to choose a disinfectant that does the kill job without the residue and evacuation cost, so turnover is faster and the next crop is not starting in a chemical film. This is where the product choice ties directly back to the downtime pain: a disinfectant you can apply without clearing the building for a day is a disinfectant that shortens turnover.
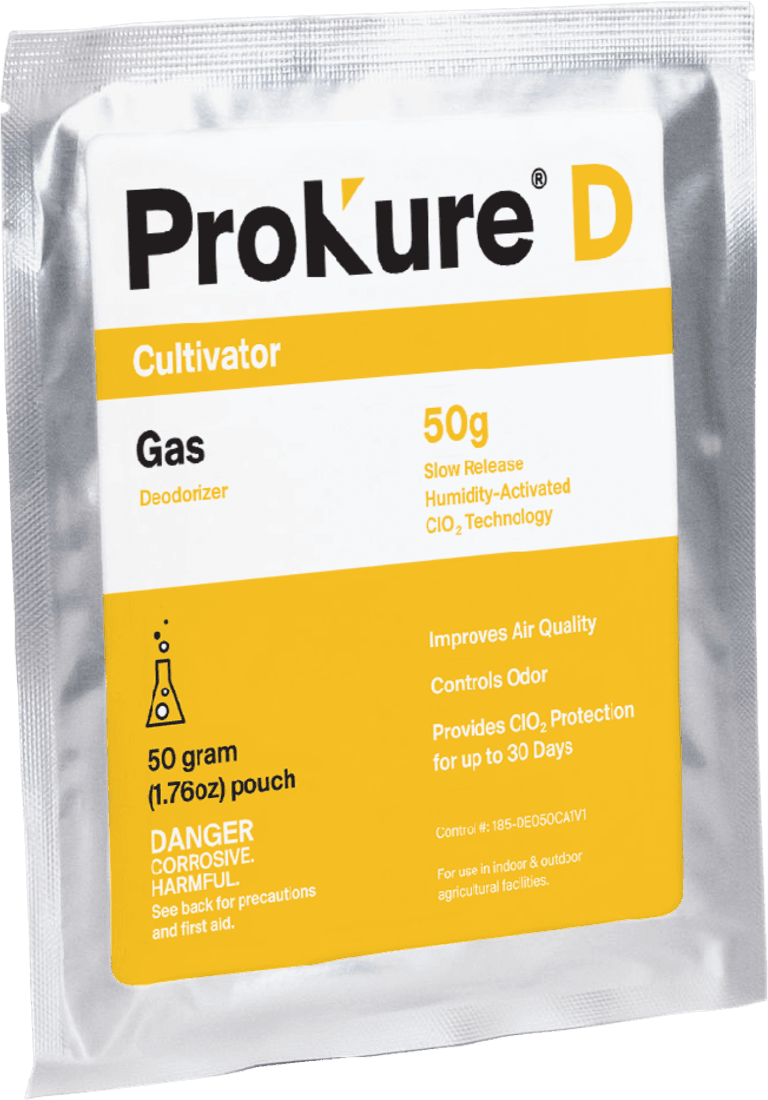
Here is where the ProKure line fits the two jobs a facility manager actually has. For between-cycle surface disinfection, ProKure V is a hospital-type liquid disinfectant, EPA Reg. No. 87508-3-89334, that kills mold and mildew commonly found in greenhouses and indoor and outdoor agricultural facilities, is suitable for use with plants in the room, and leaves no residue. For room air quality, ProKure D is a slow-release ClO2 gas that improves air quality and controls odors and provides ClO2 protection for up to 30 days, running with plants in the room. (ProKure D is not an EPA-registered product and not labeled for sale as a pesticide under 40 CFR.) Surface and air are two jobs, two products, both ClO2.
ClO2, in one paragraph: chlorine dioxide is an oxidizing chemistry used in cultivation for surface disinfection and air quality, delivered by ProKure as a liquid (V) and as gas systems (G and D). It is the chemistry this checklist references for residue-conscious surface work and for room air. If ClO2 is new to you, that unfamiliarity is common and worth closing with a short primer before you select a product; the air-quality management overview is the right next read, and from there you can reorder consumables on shop.groclarity.com and pull every label and SDS from prokuresolutions.com. One non-negotiable to repeat, because it is the most common audit miss: the SDS for every product you use must be accessible on-site during any inspection, on the wall or in a binder or a digital equivalent the crew can open in front of an inspector, not buried in an email thread.
The audit trail and when to escalate beyond the checklist
A checklist that is executed but not logged protects the crop and nothing else. The log is what protects the business, and it is also the thing a state inspector reaches for first. Here is what to keep and why, followed by the three signals that mean the checklist alone is no longer enough.
Keep humidity and temperature logs, per room, per shift, in a fixed format: these are the backbone that prove the environment stayed in range and surface drift early. Keep sanitation cycle logs, with product, concentration, applicator, and time, for every weekly tool sanitation and every between-cycle turnover, because that record shows an auditor the sanitation happened on a cadence rather than once before the visit. Keep the SDS binder or digital equivalent current for every product in the checklist; an inspector will ask for it, and the procurement and QA audit-readiness workflow owns keeping it current, so coordinate there. Keep air-test results with date and zone, which over months become the data trail that answers ownership's question, how do we know it is working, with evidence instead of assurance.
The one that matters most on the worst day: the moment a positive test happens, the paper trail you have already built is what limits liability. A documented, cadence-based prevention program is the difference between an isolated failure and a pattern of negligence in the eyes of a regulator. Build the trail before you need it, because you cannot build it after.
Three situations are signals to escalate beyond the checklist, and a facility manager should know the gate for each. A persistent musty smell after a full sanitation means hidden moisture the surface routine cannot reach, often in a wall cavity, a duct, or under flooring; that is an HVAC or building-envelope contractor call, not another round of wiping. A repeat total-yeast-and-mold failure across cycles despite a clean, logged checklist points at genetics or air handling rather than sanitation; that is a cultivation consultant or air-handling review, because you are solving the wrong problem if you keep scrubbing. Visible mold on a mature crop is not a checklist item at all: quarantine the room, notify ownership, and do not attempt to save the crop on your own judgment, because you cannot cure mold on finished flower and the job is containment and the documented response. If you are already at that point, the mold-load remediation path is where to go next.
Frequently asked questions
The questions below are the ones a facility manager actually asks when standing in the room, pulled from the mold-in-cannabis intent cluster. The full printable grid follows.
Download the printable checklist
The daily, weekly, monthly, per-cycle, and annual grid above is built to be printed. Keep a laminated copy in each room and a master in the SDS binder, so the routine is visible to the crew and the log lines are filled in where the work happens. A wall copy also does quiet training: a new crew member can see the daily five items and the logging format without a meeting. If you want this standardized across multiple facilities with identical cadence and chemistry, the multi-state standardization approach turns this single-room checklist into a footprint-wide SOP, and the procurement and QA audit-readiness workflow keeps the SDS and EPA label documents retrievable at inspection time.
Related resources