
How the Chlorine Dioxide Activation Process Actually Works (What to Expect the First Time You Activate a ClO2 Product)
You have your first chlorine dioxide product in front of you and want to know what should happen when you combine the pouch and the water before you trust it on a crop. The short version: chlorine dioxide is made on the spot by combining a dry precursor with water or ambient moisture, because the gas is too reactive to ship ready to use. A liquid product activates in a sealed, opaque container and reaches full strength after about an hour of periodic agitation, turning pale yellow with a faint chlorine-like odor. A gas product activates from moisture and releases into a sealed, empty room over hours. The rest is knowing what color, smell, and contact time to expect.
What activating chlorine dioxide actually means
The doubt a first-time user carries is simple and fair: why is there a step at all? You buy bleach and it is ready. You buy chlorine dioxide and you have to make it. That difference is the whole reason activation exists, and understanding it removes most of the first-time anxiety.
Chlorine dioxide (ClO2) is a dissolved gas, and it is unstable. Unlike a shelf-stable liquid, concentrated ClO2 cannot sit in a jug for months without degrading or becoming hazardous, so it is not shipped as a finished solution. Instead it is shipped as a dry precursor, typically a sodium chlorite formulation sealed in a pouch, that stays inert until you give it the conditions to react. Activation is you providing those conditions, water for a liquid product, ambient humidity for a gas product, so the chemistry runs and the ClO2 is generated at the moment and place you need it. In plain terms, you are not opening a finished disinfectant; you are starting a small, controlled reaction that produces one.
This is genuinely different from most products a grower handles, and naming the difference removes the first-time confusion. A bottle of bleach is a finished chemical; you dilute it, but you are not making it. A chlorine dioxide pouch is a kit for making a chemical; the disinfectant does not exist yet when you open the box. That is why there is a wait, a color change, and a discard window, none of which apply to a shelf-stable product. Once a user reframes the pouch as "ingredients for a reaction" rather than "a disinfectant in a smaller package," every rule that follows stops feeling arbitrary and starts feeling like what you would expect when you are running a reaction to completion.
The payoff for that extra step is freshness and known strength. Because you make the solution at the point of use, you are applying chlorine dioxide at a defined concentration that has not spent weeks degrading in a warehouse. A finished, shelf-stored oxidizer of this type would arrive at an unknown, declined strength, which for a disinfection claim is a real problem: you would not know whether you were meeting the contact-time kill claim or not. On-site activation trades a little of your time for certainty about what you are applying, and in a regulated, test-gated environment like cannabis, that certainty is worth the hour.
That on-site generation is a feature, not an inconvenience. It is why the product is fresh and at a known concentration when you use it, rather than a degraded solution of unknown strength. It is also why the handling rules matter: you are making a reactive gas, so the container, the ventilation, and the timing are part of the process rather than afterthoughts. The industrial world has understood this for a long time; large water-treatment plants generate ClO2 on site from precursors for exactly the same stability reason, just at a vastly larger scale. Your pouch-and-bottle version is the small-package cousin of that same principle, and the mechanism-level story of why ClO2 behaves this way is a separate topic from the hands-on process this page covers.
Why it must be made on site
It is worth sitting with the stability point, because it reframes every handling rule that follows. A finished ClO2 solution left in a clear jug in sunlight degrades, and concentrated ClO2 gas is hazardous to accumulate, which is why regulations and shipping practice keep it as a precursor until use. The two-part, make-it-now model is the industry's answer to a molecule that is too useful to skip and too unstable to stock as a finished good. Once you see activation as the price of getting a fresh, selective oxidizer on demand, the opaque container, the agitation schedule, and the discard window all read as consequences of that one fact rather than arbitrary rules.
The selectivity is the other half of why chlorine dioxide is worth the extra step. It works by oxidation rather than by chlorination, which is a different mechanism from chlorine bleach and gives it a useful profile: it is reactive toward microbes but, at use concentrations, measured enough that it is not a blunt corrosive on everything it touches, and it breaks down to benign byproducts rather than leaving a persistent residue. That combination, oxidizing power without a lingering film, is exactly what a cultivator wants on a surface a plant will later contact. The activation step is the cost of getting that profile fresh and at a known strength, which is a trade most growers find worth making once they understand what they are getting in return.
The dry precursor's shelf stability is the flip side of the activated solution's short life, and both matter for planning. An unactivated, sealed foil packet has a long shelf life, often a couple of years when kept intact in a temperature-controlled place, because the precursor is inert until triggered. That is why you can stock pouches and activate as needed rather than buying finished solution that would expire. The moment you activate, though, the clock starts, and the activated liquid is a fifteen-day item. So the inventory logic is to keep a supply of shelf-stable pouches and convert them to active solution in the amounts you will actually use within the window, rather than over-activating and discarding. Understanding the long shelf life of the pouch and the short life of the solution is what makes a ClO2 program efficient rather than wasteful.
The two-part mental model
The mental model that makes activation click is two-part: a precursor plus a trigger equals chlorine dioxide. For a liquid product the trigger is water; for a gas product the trigger is moisture in the air. The precursor is the dry pouch you never open, and the trigger is whatever you add or expose it to. The reaction happens inside the container or room you already have, not in a machine. That is the piece the industrial and academic sources on this topic never say plainly, because they describe bulk generation between precursor streams; for a cultivator with a pouch, the whole apparatus is a bottle, some water, and an hour.
It helps to name what is actually in the pouch, at the level a user needs and no deeper. The dry precursor is a sodium chlorite formulation, sealed so it stays inert until it meets its trigger. On its own, dry and sealed, it does essentially nothing; that is why an unactivated pouch has a long shelf life and ships without hazard that an activated solution would carry. The moment water reaches it, the chemistry starts, and chlorine dioxide begins forming and dissolving. You are not adding a disinfectant to water; you are using water to make one. That inversion of the usual mix-a-concentrate habit is the single idea most first-time users have to adjust to, and once it lands, the rest of the process reads as common sense.
The practical consequence of the two-part model is that timing is part of the product. With a ready-made disinfectant, the product is finished the instant you open it. With an activated one, the product is finished when the reaction is finished, which is why the clock and the agitation schedule are not suggestions. You are managing a reaction to completion, not just pouring a liquid, and that is a different frame of mind at the bench. A crew that internalizes "the product is not done until the reaction is done" stops making the impatience mistakes that under-activation causes.
The two formats you will activate: liquid versus gas
The single most important thing to get straight before you activate anything is which format you have, because liquid and gas activate differently, on different timelines, with different safety envelopes, and for different jobs. Mixing up the process for the two is the most common first-time error.
Liquid activation, the ProKure V pattern
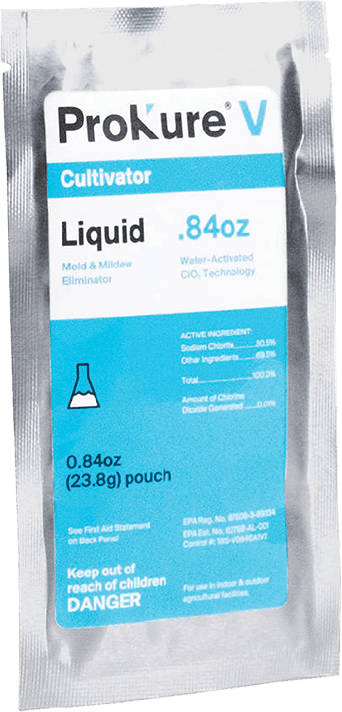
A liquid chlorine dioxide product is a surface disinfectant you activate into water. In the ProKure V pattern, you tear the foil packet, remove the white inner pouch without opening it, and drop that pouch into an opaque (not clear) container filled with a measured volume of water to hit the target concentration, which for surface disinfection is 100 ppm. Then you agitate: one minute of agitation at 15-minute intervals until full activation at one hour, five agitations in total. The solution is not at full strength until that hour is up. ProKure V is EPA-registered (Reg. No. 87508-3-89334) as a hospital-type disinfectant for hard, non-porous surfaces, applied at 100 ppm for a 10-minute contact time, and it is suitable for use with plants in the room because its claim is for surfaces, not foliage. The deep product detail lives on the ProKure V liquid disinfectant pillar.
The opaque-container rule is not fussiness. Light degrades the solution, so a clear bottle works against you, and the label specifies an opaque container for exactly that reason. The measured-water rule is what sets your concentration: too much water and you are under 100 ppm and under the kill claim, too little and you have wasted precursor. And the one-hour wait is the part first-timers rush; a solution used at fifteen minutes is not the solution the label tested, so you build the activation hour into the schedule rather than treating it as optional.
The agitation schedule deserves a word because it looks arbitrary until you understand it. One minute of agitation at the start, then again at fifteen-minute intervals, for five agitations across the hour, is not a ritual; it keeps the reaction moving and the solution uniform as the chlorine dioxide forms. Skipping agitations or doing them all up front gives you a solution that is partially reacted or unevenly concentrated, which reads as weaker than its label strength when you test it. The schedule is the difference between a solution that is at its nominal concentration throughout and one that is nominally mixed but functionally short. Set a timer for the intervals rather than trusting memory across a busy bench hour.
Sizing the pouch to the water volume is the other half of hitting 100 ppm, and the label gives you the pairings rather than leaving you to guess. A given pouch size is matched to a specific water volume to reach the nominal concentration, so a larger batch uses a correspondingly larger pouch, not more water on the same pouch. This is why you work from the label's pouch-to-water table rather than improvising: the concentration is a ratio, and the ratio is fixed by the chemistry, not by how much solution you happen to want. Mixing a small pouch into a large volume to "stretch" it gives you a weak solution that no longer meets the kill claim, which is a false economy that costs a crop rather than saving a few dollars of product.
Gas activation, the ProKure D and G patterns
A gas chlorine dioxide product activates from moisture rather than being mixed into a bottle, and it releases ClO2 into the air of a space rather than wetting a surface. There are two gas patterns, and they are not interchangeable.
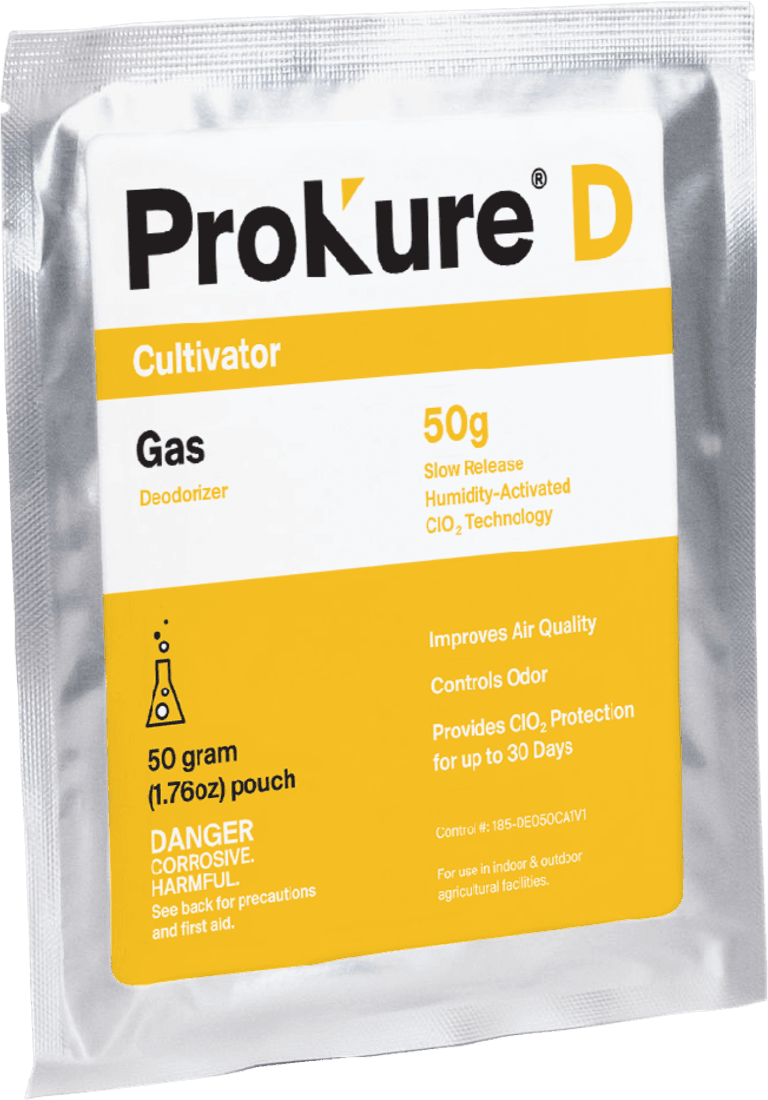
The slow-release gas, ProKure D slow-release gas, is a humidity-activated pouch or trifold that releases a trace level of ClO2 over a long window, providing ClO2 protection for up to 30 days, improving air quality and controlling odors. It comes in 10 g, 50 g, and 95 g sizes mapped to room volume, and it hangs on a stable surface or from the ceiling. It runs in an occupied room with plants present because it operates at trace levels. ProKure D is not an EPA-registered product and not labeled for sale as a pesticide under 40 CFR, and it makes no kill claim, so it is an air-quality layer, not a disinfectant.
The activation experience for the slow-release gas is almost the opposite of the liquid, and that surprises first-timers who expect a dramatic step. There is no bottle, no agitation, and no color to watch. You remove the inner pouch from its foil without opening the pouch, place it in its clamshell or trifold, and set or hang it in the room, and the ambient humidity does the rest, gradually. The 10 g pouch covers roughly 1,000 cubic feet, the 50 g about 4,000, and the 95 g about 8,000, so the activation decision is really a sizing-and-placement decision: match the pouch to the room volume and place it for even distribution. Because it is humidity-activated, higher ambient humidity drives a faster release, which is a consideration in a wet propagation space but rarely a problem in a drier flower room. The up-to-30-day window is a maximum, not a guarantee, so you plan a replacement before it closes rather than assuming a flat month.
The key mental shift for the slow-release gas is that "activation" here is passive and ongoing, not a discrete event you complete and verify in an hour. You are not making a batch; you are starting a slow, continuous release that runs for weeks. That is exactly why it is the plants-present air-quality layer: trace, continuous, and hands-off. A grower who expects it to behave like the liquid, a mix-now-use-now step, will misread it, which is why it belongs in its own format category rather than lumped with the liquid activation.
The maintenance rhythm for the slow gas is therefore a calendar task, not a mixing task. You place a correctly sized pouch, note the date, and plan its replacement before the up-to-30-day window closes so coverage does not lapse. Because release tracks humidity, a wetter room may draw a pouch down faster than a drier one, so the window is a ceiling rather than a promise, and a careful operator logs placement dates and checks them against the room's conditions. There is no color to watch and no strip to read; the verification here is simply that the right pouch is in the right place and gets replaced on time. That makes it the lowest-effort activation of the three to run day to day, once the initial sizing and placement are right.
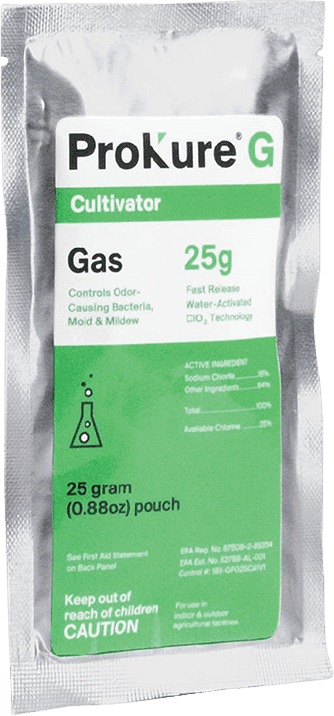
The fast-release gas, ProKure G fast-release gas, is activated by placing its inner pouch into a cup with about 1.5 inches of water, which drives a fast release that works in 4 to 6 hours, followed by one hour of ventilation before re-entry. ProKure G is EPA-registered (Reg. No. 87508-2-89334) and carries the instruction that governs its use: not for use with/on plants/crops/feed. It runs only in an empty, unoccupied room, people and plants out. That disclaimer belongs to G, the empty-room fast gas, and it must never be read onto the liquid surface product or the slow-release air product, both of which operate around plants in their own labeled ways.
The fast-release activation sits between the liquid and the slow gas in character: it uses water like the liquid, but it releases into the air like the gas. You place the inner pouch, indentations side down, into a cup or tray with about 1.5 inches of water, set it on a stable, level surface in a central location, turn off the lights, and leave the room. The water is the trigger, but unlike the liquid you are not making a solution to apply; you are starting a gas release into the sealed volume. Dosage is figured by the room's cubic footage, with the 10 g and 25 g sizes mapped to coverage areas, so like the slow gas it is a sizing-and-placement decision rather than a mix-to-concentration one. The four-to-six-hour window and the mandatory one-hour ventilation before re-entry are the two numbers that govern the operation, and they are the reason it is strictly an empty-room tool.
The single most important thing to hold about the fast gas is the plants-present boundary, because it is the one the brief-level sources get backwards. The "not for use with/on plants/crops/feed" instruction is specific to this fast-release gas. It does not apply to the liquid surface disinfectant, which is suitable for use with plants in the room, and it does not apply to the slow-release gas, which is designed to run in an occupied room. Reading that one disclaimer onto the wrong product would either needlessly bench a plants-safe tool or, worse, imply a restriction where the label does not place one. Keep the disclaimer attached to the fast gas where it belongs, and the three products stay clearly differentiated.
How to know which format your operation needs
The format follows the job, not the other way around. If the job is disinfecting hard surfaces, benches, trays, tools, tanks, floors, between cycles, that is the liquid, activated in a bottle at 100 ppm. If the job is a fast air reset of a cleared, empty room, that is the fast-release gas, activated in a water cup and run unoccupied. If the job is continuous air quality while the canopy is in the room, that is the slow-release gas, activated by ambient humidity and left to run. Deciding the job first tells you which activation process you are about to run, and it keeps you from, say, trying to mix a slow-release air pouch into a spray bottle, which is not how it works.
Most operations end up running more than one format across a cycle, which is why understanding all three activations matters even if you start with one. A typical sequence uses the liquid to disinfect surfaces when a room clears, the fast gas to reset the air of that same empty room, and the slow gas to hold air quality once the new canopy is in. Three jobs, three formats, three different activation steps, sequenced across the turn. A grower who only learns the liquid activation can run the surface step but will be lost the first time they pick up a gas product, so treating activation as a three-format skill rather than a one-product trick pays off as the program matures.
The decision also has a compliance dimension that follows directly from the labels. The surface liquid and the slow gas can operate with plants present; the fast gas cannot, because its label restricts it to unoccupied space. So "which format" is not only a question of the job but of whether the room has a crop in it right now. A live flower room rules out the fast gas on the spot, leaving the surface liquid for accessible hard surfaces and the slow gas for ambient air. An empty, cleared room opens up all three. Reading the room's occupancy state alongside the job is how an operator picks the right activation without crossing a label line.
The activation timelines are worth comparing side by side, because they set very different expectations. The liquid is an hour to full strength and then a fifteen-day usable window once activated. The fast-release gas is a four-to-six-hour working treatment plus a one-hour ventilation before re-entry, a same-day operation in a cleared room. The slow-release gas is the opposite end: it activates gradually from humidity and runs for up to thirty days on a single placement. So the same word, activation, describes a one-hour benchtop step, a same-day room event, and a month-long passive release, depending on the product. A first-time user who expects all three to behave like the liquid will misjudge the gas products badly, which is why naming the three timelines up front matters.
The safety envelopes diverge just as sharply, and matching them to the format is not optional. The liquid at 100 ppm is a mild, gloves-if-you-touch-it operation in a ventilated area. The fast-release gas deliberately builds a high concentration in a sealed room and is a people-and-plants-out operation with a mandatory ventilation period. The slow-release gas runs at trace levels low enough to share a room with a live canopy. One product form you can activate on an open bench with the crew working nearby; another you must evacuate the room for. Reading the format correctly is therefore a safety decision, not just a workflow one, and it is the reason this page treats the liquid-versus-gas split as the first thing to settle.
What the liquid activation process looks like, step by step
For the liquid pattern, here is the actual sequence and what you should observe at each point, so you can tell activation is working rather than guessing. This is the part the industrial chemistry pages never show a small-package user.
At the start, you have clear water and a sealed white pouch. Nothing is happening yet; the precursor is inert until it is in the water. You add the pouch, seal the opaque container, and begin the agitation schedule. Over the first several minutes the water begins to take on a pale tint as ClO2 forms and dissolves. By the time you have run the agitations across the hour, the solution has developed a light yellow color and a faint chlorine-like odor, which are your two at-a-glance signs that the reaction ran. The color and smell are the ClO2 in solution; a solution that stayed perfectly clear and odorless is a solution that did not activate, usually because the pouch was compromised or the water was wrong.
Walk the hour as a first-timer should expect it. In the opening minutes after the first agitation, the water is barely tinted; do not panic that nothing is visibly happening, because the color builds gradually rather than flashing on. Around the middle of the hour, after two or three agitations, the tint is clearly present and deepening. By the final agitation near the hour mark, the color has come up and settled, which is your signal the reaction has reached its working strength. The settling is the part the peer-reviewed literature describes as the reaction accelerating and then leveling as it completes; you do not need the kinetics, only the observation that a color that is still visibly deepening is not done, and a color that has stabilized is. The hour is not padding; it is the time the chemistry takes.
What can go wrong at activation is worth naming so you can diagnose it. If the solution never colors or smells, the pouch may have been compromised in storage, the water may have been wrong, or the pouch may be expired, and you should not use it. If the color is far weaker than expected, check your water volume against the label pouch pairing, because too much water is the usual culprit. If the smell is overwhelming rather than faint, you may have too much product for the space or inadequate ventilation, and you should open the area up. Treat these as a short diagnostic checklist rather than a reason to distrust the product; a correct activation is consistent once your water and pouch sizing are right.
The one-hour mark is the point the label defines as full activation, reached through the five agitations. That hour is doing real chemistry: the agitation keeps the reaction moving and ensures the solution reaches its full, uniform strength rather than a partial one. This is why the label is specific about the schedule rather than saying "mix and go." Rushing to use the solution at fifteen or thirty minutes gives you an under-strength disinfectant that may not meet the contact-time kill claim, which is the quiet reason a protocol "does not work" when the real failure was an impatient activation.
Water temperature is a variable the industrial literature treats in pH-and-kinetics terms and a cultivator should understand in plain ones. Warmer water tends to drive the reaction faster, cold water slows it, and genuinely hot water is a mistake because it can drive chlorine dioxide out of solution as gas before you ever use it, costing you the strength you were trying to build. Room-temperature water is the safe default; the label specifies a temperature range for a reason, and staying inside it keeps the activation predictable. If your source water is very cold, expect the color to come up more slowly and give the full hour its due rather than concluding the pouch failed. The reaction is temperature-sensitive, so a cold-room activation is not a broken one, just a slower one.
The container should be sealed during activation for two reasons that reinforce each other. First, chlorine dioxide is volatile, so an open container lets the gas you are generating escape, weakening the solution. Second, the sealed, opaque container is also the safe way to contain a reactive gas while it forms. Snap the container closed, run your agitations, and open it only when you are ready to use or further dilute the solution. Treating activation as a closed-container step rather than an open-beaker one is both a strength and a safety habit, and it is how the label intends the process to run.
Why the color changes, in plain language
The color change is the visible proof the reaction is producing chlorine dioxide, and you do not need the equations to use it as a signal. In chemistry terms, the dry precursor is converting into dissolved ClO2, and ClO2 in water carries a yellow-to-greenish tint; the peer-reviewed literature on chlorite activation describes a self-catalyzing reaction where intermediates accumulate and accelerate ClO2 formation, which is the technical version of "the color comes up and then settles." For your purposes on a bench, the takeaway is simpler: a developing yellow tint means it is working, a stable color means it has reached strength, and no color means something went wrong. Treat the color as a gauge, not a decoration.
There is a useful nuance in the color's trajectory. Because the reaction self-accelerates before it completes, the color does not rise at a constant rate; it comes up gradually, then more quickly through the middle of the activation, then levels off as the reaction finishes. That is why checking the color at ten minutes can mislead a first-timer into thinking a batch is weak when it is simply early. The honest read is the one at the end of the hour, after the final agitation, when the color has stopped deepening. A batch whose color is still visibly climbing has not finished; a batch whose color has held steady across the last agitation has. Reading the endpoint rather than a midpoint is the discipline that keeps you from either rushing a live batch or discarding a good one.
Color intensity is also a rough proxy for concentration, which is why it is worth learning what your correct result looks like. A properly activated 100 ppm solution has a characteristic depth of yellow for your water and container; once you have verified a few batches with test strips, you will recognize that look and be able to spot an obviously weak or off batch by eye. That calibration, matching the visual to a verified number early on, turns the free color check into a reliable at-a-glance gauge for the dozens of activations that follow. It does not replace the test strip for anything that matters, but it catches gross errors before you waste time on a bad batch.
Why the smell is there and what it should not be
The faint chlorine-like odor is normal and expected; it is the ClO2, and a properly activated solution has it. What the smell should not be is overwhelming or acrid in a way that makes the room hard to occupy, because at the 100 ppm surface concentration the solution is mild and respiratory PPE is not required. A sharp, choking odor is a sign of either too much product for the space or inadequate ventilation, and it is your cue to open the area up rather than push through. Smell is a crude but real feedback channel: present and faint is right, absent means no activation, overwhelming means something is off with your ratio or airflow.
It helps to set expectations against chlorine bleach, because that is the smell most growers have a reference for. Chlorine dioxide has a distinct odor that is related to but not identical to bleach, and at the mild surface concentration it should read as a light, clean oxidizer smell rather than the heavy, lingering chlorine fug of a bleach turnover. Part of the appeal of the product is precisely that a 100 ppm working solution does not fill a room with fumes the way a bleach reset does, which is one reason it fits a plants-in-room, crew-present workflow. If your activated liquid smells as aggressive as a bleach bucket, that is a signal to check your ratio and your ventilation, not the expected baseline.
One caution on using smell as your only guide: olfactory fatigue is real, and a crew working around the product all day stops noticing a smell that a fresh nose would catch. That is another argument for the test strip and, for gas work, a monitor, rather than trusting noses alone. Smell is a fast first indicator, useful for catching an obviously dead or obviously overwhelming batch, but it is not a measurement, and a program that relies on it exclusively will drift without knowing it. Pair the quick sensory read with the quantitative check and you get both speed and accuracy.
What you need before you start, and what not to do
Activation is low-drama when you set up correctly and it is where most mistakes happen when you do not. A few setup rules carry across every activation you will run.
Container material matters. For a liquid activation, use an opaque plastic container the label specifies, not a clear bottle and not a metal one. Light degrades the solution, which is the opaque requirement, and chlorine dioxide is reactive with some materials, so the inert plastic the product ships with or specifies is the safe choice. Never reuse or refill a single-use pouch, and never open the white inner pouch, because the dry precursor inside is corrosive and is meant to react through the pouch, not in your hand.
The no-metal point is worth making explicit because a grower reaching for a convenient container may grab a stainless pail out of habit. Chlorine dioxide is an oxidizer, and prolonged contact with reactive metals is exactly the kind of interaction the material guidance exists to prevent. Stick to the opaque plastic the product specifies or a compatible plastic sprayer; the goal is a container that neither lets light in nor reacts with the solution. For application, a plastic pump sprayer, mop, or sponge are the label methods, and the same no-fogging rule that applies to the liquid surface product applies here: you wet surfaces, you do not aerosolize the solution into the air.
Water quality is a quieter setup variable. The activation reaction runs on water, and ordinary potable water at room temperature is the default; the label does not ask for anything exotic. What you avoid is hot water, which drives off gas, and heavily contaminated water, since organic load in the water itself can begin consuming the chlorine dioxide before you even apply it. Clean, room-temperature water in a clean container gives you a clean activation, and that is most of the battle. None of this is demanding, but each piece is a small way an activation can come out weaker than intended if ignored, which is why the setup checklist is worth running the same way every time.
Ventilation matters, scaled to the product. A 100 ppm liquid activation in a well-ventilated area is a mild operation that needs gloves only if your hands will contact the solution. A gas activation is a different envelope entirely: a fast-release gas treatment builds a high concentration in a sealed room on purpose, which is why it runs unoccupied with a ventilation period before re-entry. Match the ventilation and the PPE to the product form, and never run a gas fumigation as if it were a benchtop mix.
The PPE question has a clean answer that first-timers over- or under-do. For the liquid at 100 ppm, respiratory protection is not required, and the only PPE the label calls for is gloves when your hands will be in the activated solution during mixing or application. That is the mild case, and over-gearing for it is unnecessary. The dry precursor pouch, before activation, is the hazardous end: it is corrosive, so you handle it carefully, do not open it, and keep it away from skin and eyes. So the risk profile actually inverts from what a newcomer expects, the concentrated dry pouch is the thing to respect, and the diluted working solution is the mild part. Understanding that inversion keeps a crew from fearing the bottle while mishandling the pouch.
Setup also means staging the activation so the hour is not wasted. Because the liquid takes an hour to reach strength, the efficient crews mix at the start of a shift or ahead of a turnover, so the solution is ready when the work is, rather than standing around waiting mid-task. Label the container with the activation date and time the moment you seal it, both so you know when it reached strength and so you can track the fifteen-day discard window. A small amount of planning around the activation hour is the difference between a smooth turnover and a crew idling while a bottle finishes reacting.
Do not mix chlorine dioxide products with other chemicals. The precursor is not compatible with acids, reducing agents, or other cleaners, and combining them can produce a dangerous reaction. Activate with water only, per the label, in a clean container, and keep the activated solution away from heat, sparks, and light. These are not abstract cautions; they are the handling rules that keep a routine activation routine.
The discard window people forget
An activated liquid solution does not last indefinitely, and the window is shorter than people assume. For the ProKure V pattern, unused activated solution should be stored in a dark, sealed container out of sunlight and away from food, with the activation date recorded, and discarded after 15 days. The practical rule for a working operation is tighter: a bucket or bottle mixed for a shift is good for that shift, an activated batch held sealed is good for up to 15 days, and a solution older than that is not full strength no matter how it looks. Writing the activation date on the container the moment you make it is the one habit that keeps a crew from using a stale solution and wondering why the result slipped.
The fifteen-day window is a consequence of the same instability that forced on-site activation in the first place. The chlorine dioxide you generated begins to decline from the moment it forms, slowly in a dark, sealed, cool container and faster with light, heat, or air exposure. So the storage rules, dark, sealed, out of sunlight, away from food, are not arbitrary; they are what slows the decline enough to make the fifteen-day window real. A solution left in a clear bottle on a sunny bench will fall below strength well before fifteen days, which is why the storage conditions and the discard date work together. The date on the container is only meaningful if the container was stored the way the label specifies.
For planning, this argues for activating in realistic batch sizes rather than mixing a large volume you will not use. Because the activated solution is a short-lived item, a crew that over-activates is simply discarding product and precursor on day fifteen. The efficient pattern is to keep shelf-stable pouches in inventory and convert them to solution in the amounts a given turnover or week will actually consume, which keeps waste low and ensures the solution in use is always comfortably within its window. Matching batch size to real consumption is a small operational discipline that the short active life makes worth doing deliberately.
How to verify your activated solution is actually working
The first-time user's real question under all of this is "how do I know it worked?" You have three verification channels, and a serious protocol uses more than one.
Color and odor are the fast, free checks. A properly activated liquid is a light yellow with a faint chlorine-like smell; both present means the reaction ran. They are necessary but not precise, because they tell you ClO2 is present, not exactly how much. Use them as the first gate: if a batch is colorless or odorless, stop there, because it did not activate and no amount of contact time will fix a solution that has no chlorine dioxide in it.
Test strips are the quantitative check. Chlorine dioxide test strips read the concentration of your activated solution, so you can confirm you actually hit your target rather than assuming the mix was right. This matters because the whole point of the measured-water step is a known concentration, and a test strip is how you close the loop. Verification is especially worth it the first few times you activate, while you are learning what the correct result looks and reads like for your water and your conditions. A strip reading well below your target points you back to the water volume or the activation time; a reading on target confirms both the ratio and the reaction. For a QA-conscious operation, the strip reading is also the number that goes in the log, which turns "we activated it" into "we activated it to a verified concentration on this date," a meaningfully stronger record at audit time.
The three checks form a sequence, not a menu, and a careful operator runs them in order. Color and odor first, as the free go or no-go. Test strip second, to confirm the number. Contact time third, at the point of use, to confirm the solution did the labeled job on the surface. Skipping the first wastes a strip on an obviously dead batch; skipping the second leaves you guessing on strength; skipping the third means even a perfect solution may not have met its claim because it dried too fast. Each check guards a different failure, which is why a serious protocol uses all three rather than trusting one.
Contact time is the check people skip and the one that decides whether the disinfection claim holds. A correctly activated 100 ppm solution still only meets its surface kill claim if the surface stays visibly wet for the full 10-minute contact time. So verification is not only "is the solution strong enough" but "did I hold it on the surface long enough." A strong solution wiped off in ninety seconds did not do the labeled job. Logging the concentration you verified and the contact time you held, alongside the date and room, is what turns a verified activation into a record a QA lead can show, and documentation like that is the backbone of a defensible program under cultivation IPM expertise.
For the gas products, verification looks different because you are confirming an air outcome, not a solution strength. With the fast-release gas, the verification that matters is the re-entry check: the room has been treated for the labeled 4 to 6 hours and then ventilated for the required hour, and the ambient level is back down before anyone goes in. A chlorine dioxide monitor is the honest way to confirm the re-entry condition rather than assuming the clock was enough. With the slow-release gas, verification is about placement and coverage, confirming you sized the pouch to the room volume and placed it correctly, since there is no mixed concentration to test. The point generalizes: verify the thing the product actually controls, solution strength for the liquid, room condition for the gases.
The re-entry verification on the fast gas is the safety-critical one, and it is worth being firm about. The one-hour ventilation before re-entry is a minimum tied to the labeled process, not a target to shave when a turnover is running late. Because chlorine dioxide is a respiratory irritant at concentration, walking into a room that has not fully cleared is exactly the exposure the procedure exists to prevent. Where a facility runs gas treatments regularly, a fixed chlorine dioxide monitor at the door removes the judgment call entirely: it reads the ambient level and tells you objectively whether the room is safe, rather than relying on a stopwatch and a nose that may be fatigued. Pairing the clock with a monitor is how a careful operation makes the re-entry decision defensible as well as safe.
The reason to verify at all, rather than trust the process, is that the failure modes are silent. An under-activated liquid looks almost like a good one; a slightly weak solution still has some color and odor. A gas treatment that was cut short still smells treated. Only a test strip, a monitor, or a disciplined log catches the difference between "looked done" and "was done." First-time users especially benefit from verifying the first several activations, because that is how you calibrate what the correct result looks, smells, and reads like for your specific water and conditions, after which the fast color-and-odor check becomes a reliable at-a-glance gauge.
Activate, then dilute: the step that trips people up
There is a subtlety in the liquid process that first-timers miss: activation and working concentration are not always the same step. You activate to a nominal concentration, and some end uses then call for a further dilution to a lower working concentration.
In the ProKure V pattern, the pouch is activated into a measured volume of water to reach 100 ppm, which is the surface disinfection concentration. Lower-concentration uses on the same label, like a food-contact sanitizer tier, are reached by diluting the 100 ppm solution further per the label's dilution table, for example to the single-digit ppm range. The order matters: you activate first to the nominal strength, confirm it, then dilute down if your specific use calls for a lower concentration. Diluting before full activation, or guessing the dilution instead of using the label's ratios, gives you an unknown concentration and an unreliable result. Activate to the known number, verify, then step down only if your job needs it.
This activate-then-dilute logic is also why the measured-water step at activation is not something to eyeball. Your activation concentration is the reference point every later dilution is calculated from, so an inaccurate activation propagates into every working solution you make from it. Get the activation ratio right against the label, and the dilutions downstream are simple arithmetic; get it wrong, and nothing downstream is trustworthy.
A worked way to think about it: the label's dilution table expresses the step-downs as ratios from the 100 ppm stock, for example one part stock to several parts water for a lower-ppm sanitizer use. Those ratios only produce the intended working concentration if the stock is truly at 100 ppm, which loops straight back to a correct activation. A grower who activated to only 70 ppm because of too much water, then diluted "to 20 ppm" using the table, is actually landing well below 20 ppm and does not know it. The arithmetic is only as good as the stock it starts from, which is the entire case for verifying the activated stock with a test strip before you dilute anything from it.
For most cultivation surface work, you do not dilute at all; you activate to 100 ppm and use it at 100 ppm on hard surfaces for the 10-minute contact time. The dilution step matters mainly for the lower-concentration uses on the same label, such as food-contact sanitizing, where a reduced ppm and shorter contact time apply. So for a first-time surface-disinfection user, the honest guidance is simpler than the activate-then-dilute framing suggests: activate to 100 ppm, verify, and use it, and only reach for the dilution table if your specific job is one of the lower-concentration label uses. Knowing the dilution logic exists keeps you from misapplying a stock solution, but most of the time the stock is the working solution.
Chlorine dioxide is not for ingestion, and what the registration actually covers
A plain safety statement belongs on any honest activation page, because the search landscape around this topic is polluted with misinformation. Some of the questions people ask about chlorine dioxide, whether it is safe to drink, whether it is used as a mouthwash or taken orally, come from dangerous misinformation, and the answer is unambiguous: activated chlorine dioxide disinfectant solutions are for surfaces and air, not for ingestion, and ingesting chlorine dioxide is hazardous.
What an EPA registration like ProKure V's actually covers is surface disinfection of hard, non-porous surfaces at a labeled concentration and contact time. It does not authorize, and nothing on this page should be read to suggest, any oral, drinking, or medicinal use. The products discussed here are cultivation sanitation tools: a liquid for surfaces, gas products for room air quality and reset. Keeping that line bright is part of being an authoritative source rather than an avoidant one. If your interest in chlorine dioxide is anything other than facility and surface sanitation, this page is not the one you are looking for, and no legitimate ClO2 disinfectant label supports ingestion.
The reason this paragraph exists at all is that the search landscape around "chlorine dioxide" is crowded with ingestion-related questions that trace to a well-documented stream of health misinformation, and a cultivator researching an honest sanitation product deserves a clear line between the two. The industrial and agricultural use of chlorine dioxide, as a disinfectant and oxidant for surfaces, water systems, and air, is legitimate, well-studied, and regulated. The promotion of chlorine dioxide or related solutions for human consumption is not, and health authorities have warned against it. Those are two entirely different conversations that happen to share a molecule name, and this page is squarely in the first one.
For a facility operator, the practical takeaway is to keep your program and your documentation on the right side of that line. Your labels, SDS, and SOPs describe surface and air sanitation at labeled concentrations, and that is the whole scope. If a staff member or a customer ever raises an ingestion claim about chlorine dioxide, the correct response is that these are surface and air disinfectants, full stop, and the registration covers nothing else. Being able to state that plainly is part of running a credible, compliant operation, and it is why a serious sanitation vendor addresses the misinformation directly rather than pretending the question does not get asked.
The same clarity protects your marketing and your compliance posture. Nothing in a cultivation sanitation program should ever be described in health or consumption terms, because that language is both false for these products and a regulatory liability. Keep the product claims to what the labels support, surface disinfection for the liquid, air quality and odor control for the gases, and the operation stays clearly inside the legitimate, well-regulated use of chlorine dioxide. A grower who hears a dramatic health claim about chlorine dioxide from any source should treat it as a reason to distrust that source, not the chemistry, which does exactly one job here: it sanitizes surfaces and air in a facility, at labeled concentrations, and nothing more.
Why the activation process is worth it for a cultivator
Stepping back from the mechanics, the reason a grower tolerates an activation step at all is that the resulting product does a job the convenient alternatives do not. The whole point of generating a fresh oxidizer on site is that you get a disinfectant that works on the pathogens a grow actually fights and then dissipates without leaving residue.
That ties directly to the pain most cultivators are solving: mold. A correctly activated surface disinfectant clears the pathogen reservoir on equipment and surfaces that would otherwise seed the next crop, and the air products hold or reset the room's air quality, which together support passing the pre-sale yeast and mold testing most states require. The activation step is the cost of admission for a residue-free, plant-compatible surface disinfectant, which is exactly why a cultivator picks it over a bleach that corrodes and needs rinsing or a quat that leaves a film. The efficacy story against specific molds is its own topic, and the air-quality side of the program runs through air quality management, but the throughline is that the activation you just learned is what makes the rest of the program possible.
Weigh the activation hour against what it protects and the trade is lopsided. A failed pre-sale microbial test on a mature harvest is a six-figure loss, and the sanitation that prevents it depends on a solution that was actually at strength when it hit the surface. An hour of attention at activation, done right, is a trivial cost against that downside, and the residue-free profile means you are not trading mold risk for a chemical-carryover risk on the crop. Growers who resent the activation step are usually comparing it to the convenience of grabbing bleach, not to the cost of the failed test the program is there to prevent. Framed against the real downside, the activation step is cheap insurance, not a chore.
The residue-free, dissipating nature of chlorine dioxide is worth restating as the payoff for the activation effort, because it is the property that makes the extra step worth it in a grow specifically. You activate, you apply, the solution does its work during the contact time, and then it dissipates without leaving a film on a surface your next clone will touch. That is the opposite of a quat's persistent residue or a bleach film you are supposed to rinse and often cannot. In a facility where surfaces sit constantly near plants and product headed for a contaminant panel, clean-in-and-nothing-left-behind is not a minor convenience; it is the reason the category fits the work. The activation step is simply the toll you pay to get that profile fresh and at a verified strength each time.
There is a program-level point worth making, because activation is never the whole job, only the first step of it. An activated solution is a tool you then deploy into a sanitation routine: surfaces disinfected between cycles, tools sanitized between plants, rooms reset when they clear, air held while the canopy grows. The activation step is the gateway to all of that, which is why learning it well pays off across every later task. A crew that activates reliably has removed the most common point of failure in a ClO2 program, the under-strength or improperly made solution, and everything downstream, the contact time, the coverage, the documentation, gets easier once the input is trustworthy.
Training is where this becomes an operational advantage rather than a per-person skill. Because activation is the same legible sequence every time, water, pouch, seal, agitate on schedule, verify, it is straightforward to write into an SOP and teach to a new crew member in a single session. The signals, color and odor and strip reading, are concrete enough that a trainee can see when they got it right. An operation that documents the activation procedure once and trains to it stops depending on one experienced person's feel for the process and gets a repeatable result across shifts and new hires. That repeatability is what turns a chemistry curiosity into a dependable part of a program.
The documentation habit built at activation also pays off at audit time, which matters more in cannabis than in most industries. Recording the activation date, the verified concentration, and the contact time held, by room and by batch, produces exactly the trail a state inspector or a buyer audit asks for. A grower who activates carefully but keeps no record can prove nothing; a grower who logs each activation can show a continuous, verified sanitation history. Since the activation step is where the measurable numbers, concentration and date, originate, it is the natural anchor for the whole record, which is one more reason to treat it as a disciplined, documented step rather than a casual mix.
It also connects to the reason most cultivators are here in the first place, which is usually mold and the pre-sale testing that hangs on it. A correctly activated surface disinfectant clears the pathogen reservoir on the equipment and surfaces that would otherwise seed the next crop, and the gas products hold or reset the room air, which together support passing the yeast and mold panels most states require. None of that works if the activation is wrong, because an under-strength solution is a disinfection step that only looks like one. So the humble activation hour is load-bearing: it is the difference between a sanitation program that passes tests and one that quietly does not, and it is the input every other control in the program depends on.
For a first-time user, the reassuring summary is that activation is a short, legible process with clear signals. You combine a precursor with water or moisture, you watch for color and odor, you respect the timing and the container, you verify with a strip, and you hold the contact time. Done once with attention, it stops being mysterious and becomes a routine step your crew runs the same way every time. The anxiety of the first activation is almost entirely the anxiety of not knowing what to expect, and now you do.
Frequently asked questions
These answer what first-time users actually ask about activating a chlorine dioxide product, and redirect the questions that come from misinformation. Always read the product label before use.
Related resources