
The 6-Step Cannabis Cultivation IPM Process: A Sequenced Facility Workflow
The six-step cannabis IPM process runs in order: set action thresholds, monitor and identify, prevent, control, verify, and document. You start by defining the pass-or-fail numbers your state and your facility hold to, then monitor on a cadence to catch pressure early, prevent through biosecurity and between-cycle sanitation, control in the order biological-then-mechanical-then-chemical, verify with post-treatment testing, and document everything into an audit trail. It is a repeatable loop a Head Grower can run every cycle and an auditor can follow, not a one-time cleanup, and each of the six steps produces a record that feeds directly into the next one.
Why a numbered process beats a pile of IPM tips
Most cannabis IPM content is a list of good practices with no order to it. That is useful once you know what you are doing and useless when you need a workflow to hand a crew. Integrated pest management, as the established framework defines it, is a sequence of decisions, not a grab bag of tactics, and the sequence is what makes it work. You set thresholds before you monitor, because a reading means nothing without a limit to compare it to. You prevent before you control, because the cheapest pest problem is the one that never establishes. You verify before you document, because a record of an unverified treatment proves nothing.
The classic IPM framework is often described in four core steps, and some cannabis guides expand it to eight; one widely read program frames IPM as holistic systems to manage pest pressures below the threshold of economic damage. The six-step version here keeps the rigor of the classic framework and adds the two steps a licensed cannabis facility cannot skip: verification and documentation. In a regulated industry where a batch fails or passes on a lab number and an inspector wants a paper trail, measuring the result and recording it are not optional add-ons; they are steps in the process.
This page is the process-expectation answer: what happens in each of the six steps, in what order, with what inputs, at what cadence, and with what verification data, so a Head Grower can run it and an auditor can follow it. It is not a definition of IPM, and it is not a product page. It assumes you already know you need IPM and simply want the workflow. Where a step touches a product, the product claim is stated exactly as the label states it, and the deep product detail lives on prokuresolutions.com while the buy path is on shop.groclarity.com for reorders.
One frame to carry through all six steps: the goal of cannabis IPM is not eradication, it is keeping pressure below the level that damages the crop or fails a test. That is what the phrase "below the threshold of economic damage" really means, and it is why the process starts with defining the threshold rather than reaching for a sprayer.
Step 1: Set action thresholds
Everything downstream depends on a number, so the process starts by defining the numbers. An action threshold is the point at which pest or microbial pressure requires a response, and in cannabis there are two kinds that matter.
The first is the state-mandated microbial threshold your finished flower must pass. State cannabis programs set pass-or-fail limits on total yeast and mold, and many enumerate pathogenic Aspergillus species specifically, and those limits vary by market. That external threshold is the one that fails a batch, so it is the anchor: you are managing the facility to stay under it with margin. The competing IPM guides describe monitoring and control but almost never name that the threshold is a specific, state-defined number your lab result is measured against, which leaves a grower without the one figure the whole process exists to beat.
The second is your internal early-warning trigger, set below the external limit. If the state fails flower above a given mold count, you do not wait until you are at that count to act; you set an internal threshold lower, so a rising trend triggers a response while you still have room. For airborne pressure, that trigger is often a colony-forming-units-per-cubic-meter level in the room's air that tells you to investigate before the load reaches the crop and the finished-product test.
Why set an internal trigger below the legal limit at all, rather than simply aiming to pass? Because a threshold you only check at the finish line gives you no room to respond. The finished-product test happens at the end, after the full grow cost is sunk, so if that test is your first signal, your options have collapsed to remediation or destruction. An internal trigger set with margin converts the same problem into an early, cheap intervention: a room trending toward the trigger gets attention while it is still a reservoir issue, not a failed batch. The margin is the difference between managing pressure and reacting to a loss.
What you produce in Step 1 is a written threshold sheet: the state limits that apply to you, and the internal triggers you will act on, per room and per stage. The sheet should be specific enough that a crew member can read a monitoring result and know, without judgment calls, whether it is in bounds, approaching the trigger, or over it. Ambiguity here propagates through every later step, because a vague threshold produces vague monitoring and inconsistent control. For an Owner weighing the program, this is also where the cost-of-failure math lives: one failed pre-sale mold test on a mature crop is a six-figure loss, which is the number that justifies the whole process and reframes prevention as an investment rather than a cost line. Set the thresholds, write them down, and every later step has something to measure against.
Step 2: Monitor and identify
With thresholds set, you monitor against them on a cadence, because a threshold you never measure is a threshold you cannot enforce. Monitoring is the step that turns the process from reactive to proactive.
Monitoring in a cannabis facility runs on several channels at once. Scouting the crop on a set schedule catches foliar problems early, especially the visible ones like powdery mildew. Sticky cards and pest mapping track insect pressure and where it concentrates. And air testing measures the airborne mold and yeast load as colony-forming units per cubic meter, which is the channel that catches the invisible pressure a visual scout never sees, the kind that fails a lab test from flower that looked clean. The cadence matters as much as the channels: a monthly air sample and a scheduled scout produce a trend, and a trend is what lets you act on a direction before it becomes a failure rather than reacting to a single alarming snapshot that may be noise.
Identification is the other half of this step. Finding pressure is not enough; you have to know what it is, because the control response differs for an insect, a foliar mildew, and a root or airborne fungus. Correct identification is what keeps you from throwing the wrong tool at a problem, and it is why monitoring and identification are one step rather than two. A grower who sprays for a fungus that is actually a mite problem has spent a control action and a residue budget on nothing, and lost the time the real problem kept spreading. Identification also routes the response to the right lane: a visible foliar mildew is a different protocol than an invisible airborne Aspergillus load, and only correct identification tells you which one you are in.
The deliverable from Step 2 is the monitoring record: the scouting notes, the trap counts, and the air-sample readings, logged on their cadence. That record is both the early-warning system and the first half of the data trail an auditor will want. GroClarity's on-site air sampling and online reports are the air channel of this step, turning each reading into a documented data point rather than a gut feeling.
Step 3: Prevent
Prevention is where the process does most of its work, because the pest problem you prevent costs far less than the one you control. In cannabis, prevention is biosecurity, between-cycle sanitation, and climate control working together.
Biosecurity is the facility-level discipline that keeps pressure out: controlling the path between clean and dirty rooms, glove and tool protocol, quarantine of incoming plant material, and keeping reservoirs like media, water, and drains clean. The reservoirs are the part most programs underrate, because a contaminated water line or a wet condensate pan reintroduces pressure no amount of surface cleaning addresses. Climate control is the environmental side: holding humidity and airflow in the band that denies mold and mildew the conditions they need, because no product substitutes for a dry, well-ventilated room, and a humid, stagnant canopy will defeat even a diligent sanitation program. Those two, biosecurity and climate, are the foundation that the sanitation and air-quality tools sit on top of, and the deep biosecurity SOPs live in the dedicated resource.
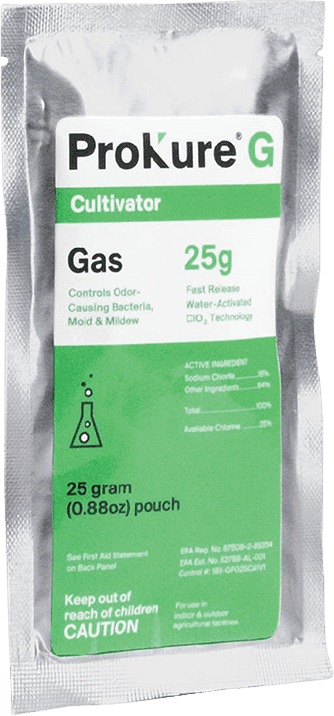
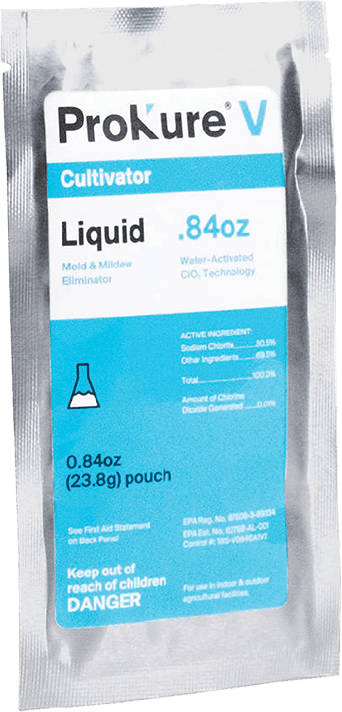
The between-cycle room turnover is the prevention step with the biggest operational payoff, because it is the one window to reset a room with no crop in the way, and it is where the Facility Manager's downtime pain lives. The common practice of bleaching and airing out costs 3 to 5 days of downtime per turnover, because bleach leaves residue and off-gasses and forces crews out. A residue-free protocol shrinks that: disinfect the hard surfaces with ProKure V, the EPA-registered liquid Hospital-Type Disinfectant (EPA Reg. No. 87508-3-89334) used at 100 ppm for a 10-minute exposure, which leaves no residue and is suitable for use with plants in the room because it treats the surface, not the plant. Reset the empty room's air fast with ProKure G, the fast-release gas that works in 4 to 6 hours with an hour of ventilation before re-entry and is labeled not for use with plants, crops, or feed, so it runs only with no crop present. The turnover-focused resource carries the full downtime math and the chemistry comparison.
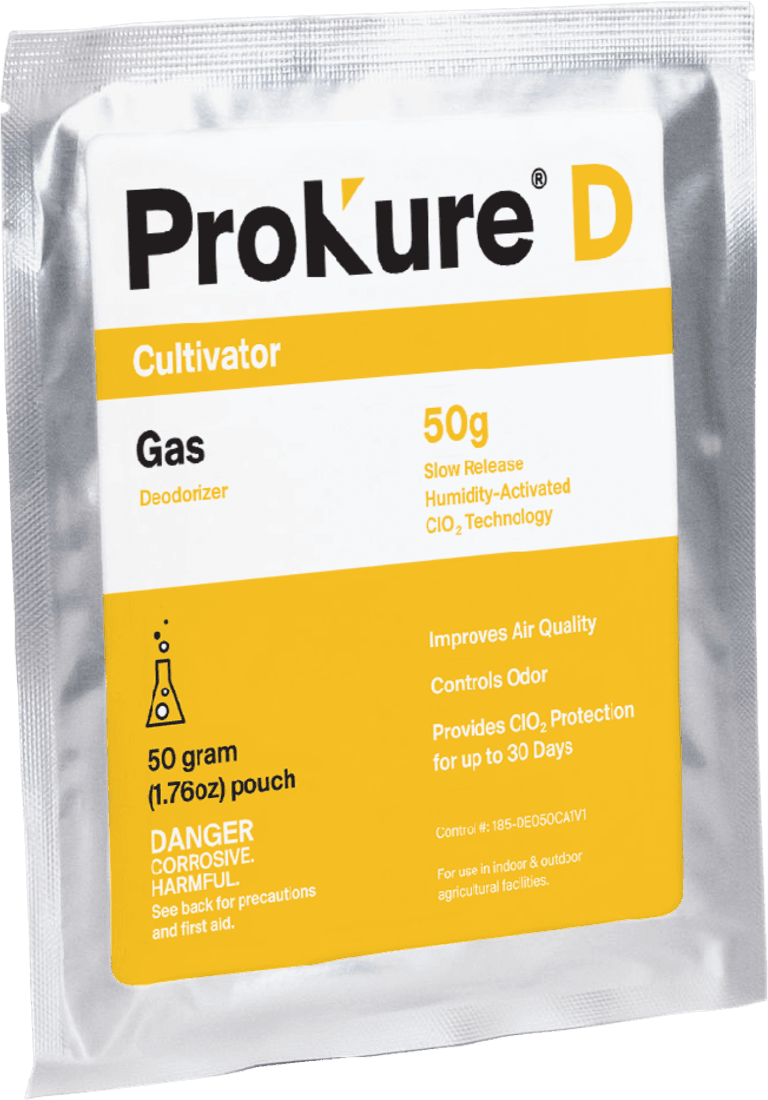
Prevention also runs during the grow, not just between cycles. ProKure D, the slow-release gas that improves air quality and controls odor for up to 30 days with the plants in the room, is the ongoing air-quality layer that holds the airborne load down through the cycle. It is not an EPA-registered product and makes no kill claim; it is the air-quality half of prevention that runs with the crop. What you keep from Step 3 is the prevention protocol itself and the turnover logs, which become the next entries in the audit trail.
Step 4: Control
When monitoring shows pressure crossing a threshold despite prevention, you control it, and IPM prescribes an order of preference: biological, then mechanical, then chemical. The order is the point, because reaching for the strongest chemical tool first is how a facility breeds resistance and leaves residue it did not need.
Biological controls come first where they fit: beneficial organisms and biological products that suppress a pest without a chemical load. Mechanical and cultural controls come next: removing and bagging infected plants, improving airflow, defoliating to break a humid microclimate, physically interrupting the problem. Chemical control is the last resort in the hierarchy, used when the lower-impact options cannot hold the pressure below threshold.
When chemical control is warranted, the EPA label governs everything, and this is where a cannabis facility gets tripped up. A product may only be used as its registered label allows. ProKure V is EPA-registered for surface disinfection on hard, non-porous surfaces. ProKure G is EPA-registered and carries the "Not for use with/on plants/crops/feed" restriction, so it runs only in an empty room. ProKure D is not an EPA-registered product and carries no kill claim. Using a registered product against its label is a violation regardless of intent, which is why the control step has to name which product does which job under which label condition. One widely read cannabis IPM program is unusual in even noting that the pesticide label is a legal document; most skip it, and skipping it is exactly the gap that fails a procurement or compliance review.
The reason the order of preference matters beyond philosophy is resistance and residue, two costs that compound over time. A pest population hit repeatedly with the same chemical tool can develop resistance, so leaning on chemistry first erodes the tool you may need most later. Residue is the other cost: every chemical application near a crop risks leaving something behind that a later test can flag, so a control strategy that reaches for chemistry only when the lower-impact options cannot hold is also the strategy that minimizes residue exposure. The hierarchy is not a moral preference; it is the sequence that keeps your tools working and your flower clean, which is why IPM insists on it.
The deliverable from Step 4 is the control record: what was identified, what control was chosen and why it sat where it did in the biological-mechanical-chemical hierarchy, and for any chemical control, the product, concentration, contact time, and label condition. That record is both operational and legal, because it shows a control decision made in the right order and a product used within its label. It is also the record that protects the operator: if a control decision is ever questioned, a log showing the lower-impact options were tried first and the chemical tool was used within its label is the difference between a defensible choice and an exposed one.
Step 5: Verify
A control you cannot verify is a control you are hoping worked, and in a regulated industry hope is not evidence. Verification is the step the four-step classic framework implies and the cannabis context makes mandatory, because an inspector and a lab both want proof, not intent.
Verification means measuring the result after you act. After a between-cycle surface disinfection, an ATP swab on the surfaces you treated gives a fast pass-or-fail reading. After an air reset or across a cycle, an air sample measures whether the viable mold and yeast load actually came down, in colony-forming units per cubic meter. For a room with a history or an upcoming inspection, a microbial retest confirms the pressure dropped before you commit the next crop. The verification channel mirrors the monitoring channel, which is deliberate: you measure the same way before and after, so the comparison is clean.
What verification adds that monitoring alone does not is the closing of the loop. Monitoring tells you a problem exists; verification tells you the response worked. A process that monitors and controls but never verifies cannot distinguish a control that fixed the problem from one that only looked like it did. The competing IPM guides describe monitoring and control but stop short of a verification step with real measurement, which leaves a grower without proof that the program is actually holding.
Verification also disciplines the rest of the process by closing a feedback loop. If a control action verifies clean, you have confirmation the response and the dose were right. If it verifies that pressure is still elevated, you have caught a failed or under-dosed control before it costs you the crop, and you can escalate or re-treat while there is still time. Without verification, a facility repeats whatever it did last time and assumes it worked, which is how a quietly failing protocol runs for cycles before a lab result exposes it. The measurement is what replaces assumption with evidence.
The deliverable from Step 5 is the verification record: the post-treatment readings paired with the pre-treatment baseline, showing the direction moved the right way. That paired record is the strongest single piece of evidence in the audit trail, because it demonstrates cause and effect rather than activity.
Step 6: Document
The last step is what turns five good steps into a defensible program, and it is the one a licensed operation cannot treat as paperwork done after the fact. Documentation is where the thresholds, the monitoring, the prevention, the control, and the verification all come together into a record an auditor accepts and a crew can repeat.
Build the record as a byproduct of the process, not a scramble before an inspection. For each room and cycle, the documentation captures the action thresholds that applied, the monitoring readings on their cadence, the prevention and turnover activities with product and contact time, the control decisions and the products used within their labels, and the verification readings paired to baselines. Keep the product labels and SDS on file, and state each product's EPA status plainly, because the "which product carries which label condition" question is exactly what a procurement or compliance review raises. This directly answers the pain growers name most: no data trail to prove air quality and sanitation to a compliance auditor.
Documentation is also where the process scales. A single facility documents to defend itself and to let a new crew member run the same room the same way. A multi-state operator standardizes the documentation across facilities, so the same thresholds, the same monitoring cadence, the same control hierarchy, and the same verification run in every state, and a Cultivation Director gets one centralized view of air-quality and sanitation data across the footprint rather than a folder of disconnected reports. That cross-facility standardization is the MSO's version of the process paying off, and it is a gap no competing IPM guide addresses.
To run the six-step IPM process in your facility, reorder the ProKure V, D, and G line on shop.groclarity.com, pull product labels and SDS from prokuresolutions.com for your audit file, and for an air-testing program or a multi-facility SOP talk to a GroClarity specialist through the contact form. This guidance is general and not legal advice; confirm your state's testing and remediation rules with your state regulatory agency, and see the product label for specific instructions and claims.
Frequently asked questions
What are the six steps of the cannabis IPM process? Set action thresholds, monitor and identify, prevent, control, verify, and document. You define the state and internal pass-or-fail numbers first, monitor against them on a cadence, prevent through biosecurity and between-cycle sanitation and climate control, control in the order biological-then-mechanical-then-chemical, verify the result with post-treatment testing, and document everything into an audit trail. The sequence is the point: each step depends on the one before it and produces a record the next step uses.
How is this different from the classic four-step IPM framework? The classic framework is often described as four steps: set action thresholds, monitor and identify, prevent, and control. The six-step cannabis version keeps those and adds verify and document, because a licensed cannabis facility is judged on a lab result and an audit trail. In a regulated industry, measuring that a control worked and recording the whole process are not optional refinements; they are steps you are effectively required to run.
Where does chlorine dioxide fit in the IPM process? Chlorine dioxide products sit mainly in the prevent and control steps, as the surface and air tools. ProKure V disinfects hard surfaces between cycles, ProKure G resets an empty room's air fast at turnover, and ProKure D holds air quality in the occupied room over up to 30 days. They are tools inside the process, not the process itself; the thresholds, monitoring, verification, and documentation are what make them effective and defensible.
How often should each step run? Thresholds are set once and revisited when the facility or the rules change. Monitoring runs continuously on a cadence, often a monthly air sample plus regular scouting. Prevention runs every cycle, with the between-cycle turnover at each room reset and the in-room air layer across the grow. Control runs when monitoring shows a threshold crossed. Verification runs after each control action and at turnover. Documentation runs continuously, as a byproduct of every other step.
Related resources